It is the greatest day for the bride and groom – and every moment is unique. None of these will ever occour again. Once briefly distracted, caught the wrong camera settings or been in the wrong place and poof – the moment is gone. And you haven’t caught it on camera.
Whether you’ve been asked by family or friends if you could photograph their wedding. Or if you want to photograph weddings more frequently on a professional basis: This post will help you. You will learn how to avoid mistakes from the beginning. Learn the best wedding photography tips so that the big day doesn’t end in disaster.
I have been photographing the most beautiful day of brides and grooms together with my colleague as Authentic Wedding wedding photography more than five years now. So I feel confident on giving you my best wedding photography tips in this post.
Prolouge: Getting into wedding photography
My parents always tell me how weddings were photographed back then. It was common that you could only book a bride and groom portrait photo shoot. Furthermore a group photo was taken. That was all! So as a wedding photographer you were able to cover several weddings per day. But these minimal service belongs to the past.
Until today wedding photography extended much further. Nowadays the whole daily routine is recorded in a big reportage. And additionally you will photograph portraits and group shots. In the end, the bride and groom want to see every in detail on your photos – thus to be able to relive the day over and over again 30 years from now.
Therefore, there are now two major divisions:
- Bride and groom portraits and group shots: In both situations you can actively give instructions. The people you are photographing rely on your commands. You are responsible to design a nice picture.
- Reportage: From early morning to evening you will capture everything that happens. Just as the day was planned by the bride and groom you won’t have a possibility to intervene anywhere or give instructions. Instead, you need to adapt well and create a reportage of the day as it comes.
Save now incl. free THO07 preset!
Both principles are very demanding and offer individual challenges:
Introverted photographers will feel more comfortable with reportage. Because at the bride and groom photo shoot and the group photo you are already once the center of attention. At the group shot often 100 people and more are waiting for your instructions. If the photo doesn’t turn out well, it is 90% your own fault.
But also the reportage photography can lead into difficult situations – probably even a few more. Because here the “loss of control” often goes to the disadvantage. The wedding takes place where it just takes place. You can influence neither place nor light. So you have to use one camera setup that delivers good pictures in 100 different situations. If you have been taking pictures for a long time, you know that it is often difficult to find universal equipment.
So there are a lot of potential mistakes you can make. But don’t worry – you will be able to avoid most of them after reading this article. After some time, photographing weddings becomes second nature. The experience will perfect your wedding photography.
At first it is important that you can already operate your camera without even thinking about it. Because as you can see, there is hardly any time to set up your camera at weddings. Or think 10 minutes about what shutter speed you need. Instead, you have to be able to fully engage with your couple, but also the other wedding guests. Your hands ned to operate the camera at the same time automatically. If you are still unsure about this, you should have a look at the photography basics first.
Preparation is everything: checking schedule and equipment
Currently, brides and grooms plan their big day 1-2 years in advance. That’s a lot of time and everyone is eagerly awaiting the date. Because by planning, everyone hopes that “everything runs smoothly”. It is a lot of money that flows into the wedding and celebration, which is often over after 12 hours.
In other words: no major mishaps should happen from your site. You can avoid this through proper preparation. It is about the knowledge of the wedding process, the right equipment and also your own condition.
Checklist: How almost every wedding goes
It’s important to find out everything about the day and schedule beforehand. Ask the bride and groom and take a few notes. In general, however, most weddings proceed very similarly. The following points already provide you a good checklist of what the schedule will probably look like:
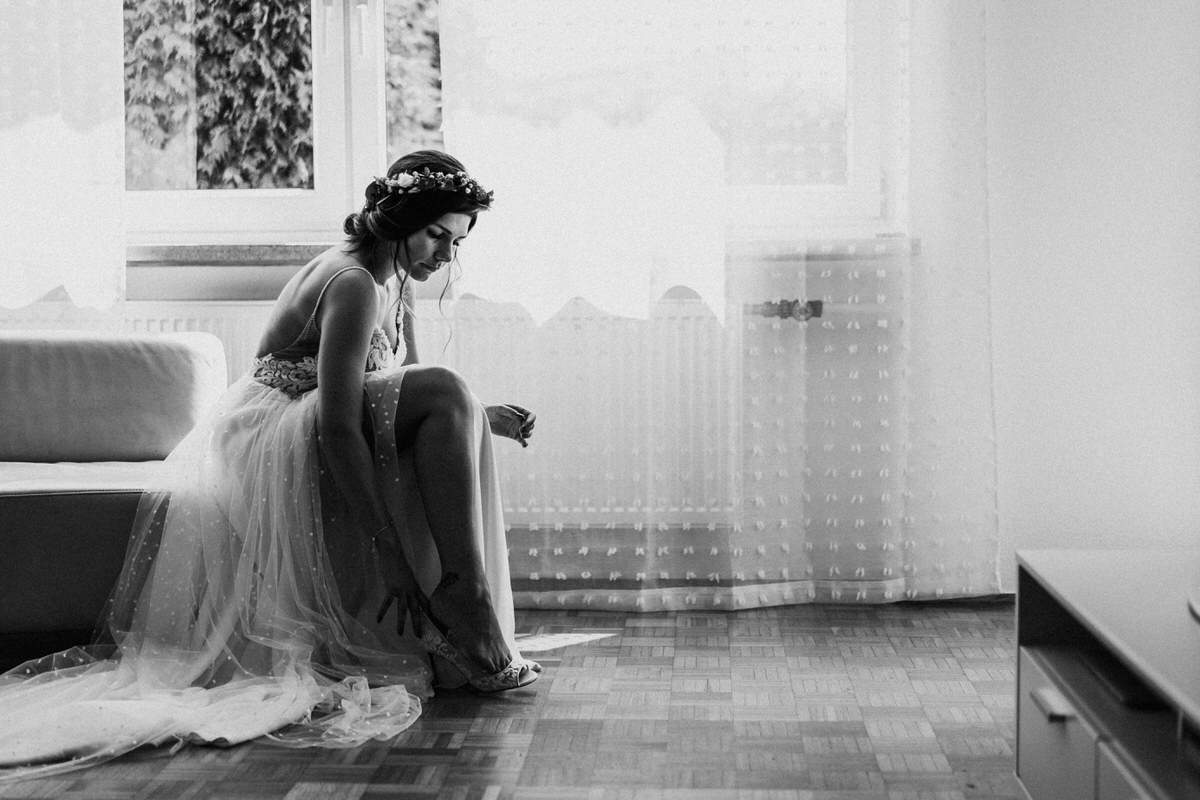
- At the »Getting-Ready« the bride and groom will prepare themselves: make-up, hairdressing, dressing, a last look in the mirror and the first presentation in front of their friends will provide many moments for your picture story.
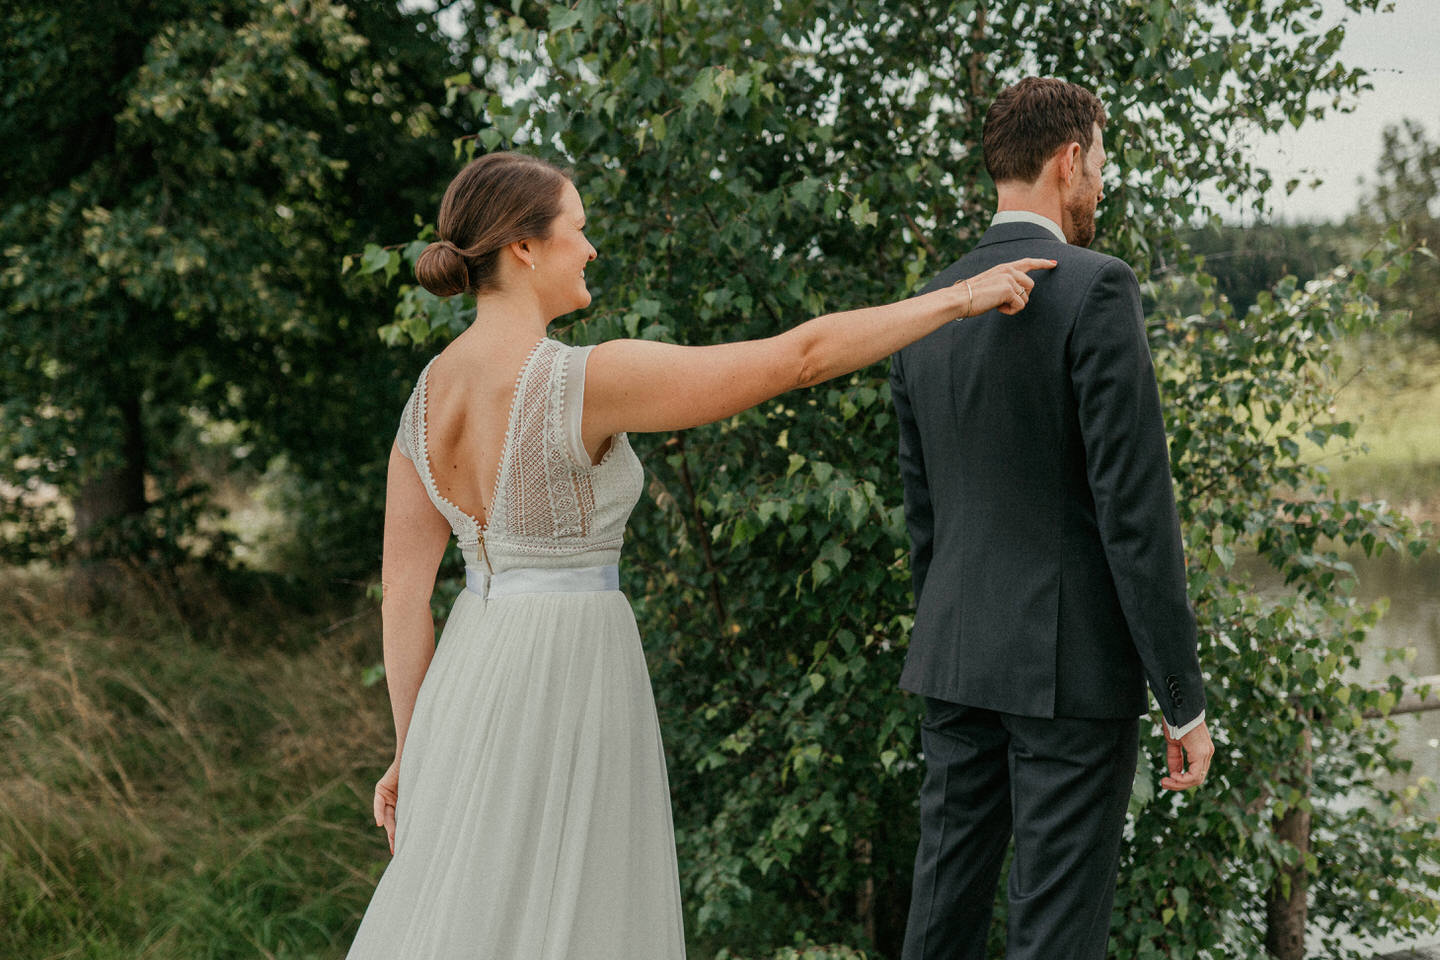
- At some weddings the bride and groom arrange a »First Look« – a moment when they see each other before the actual wedding ceremony. These are very intimate moments. Often the groom stands here with his back to the bride and waits to turn around and catch sight of the bride for the first time.
- Often the First Look is combined directly with the bride and groom portrait photo shoot. Here you photograph in 30-90 minutes a few great portraits just of your two main actors.
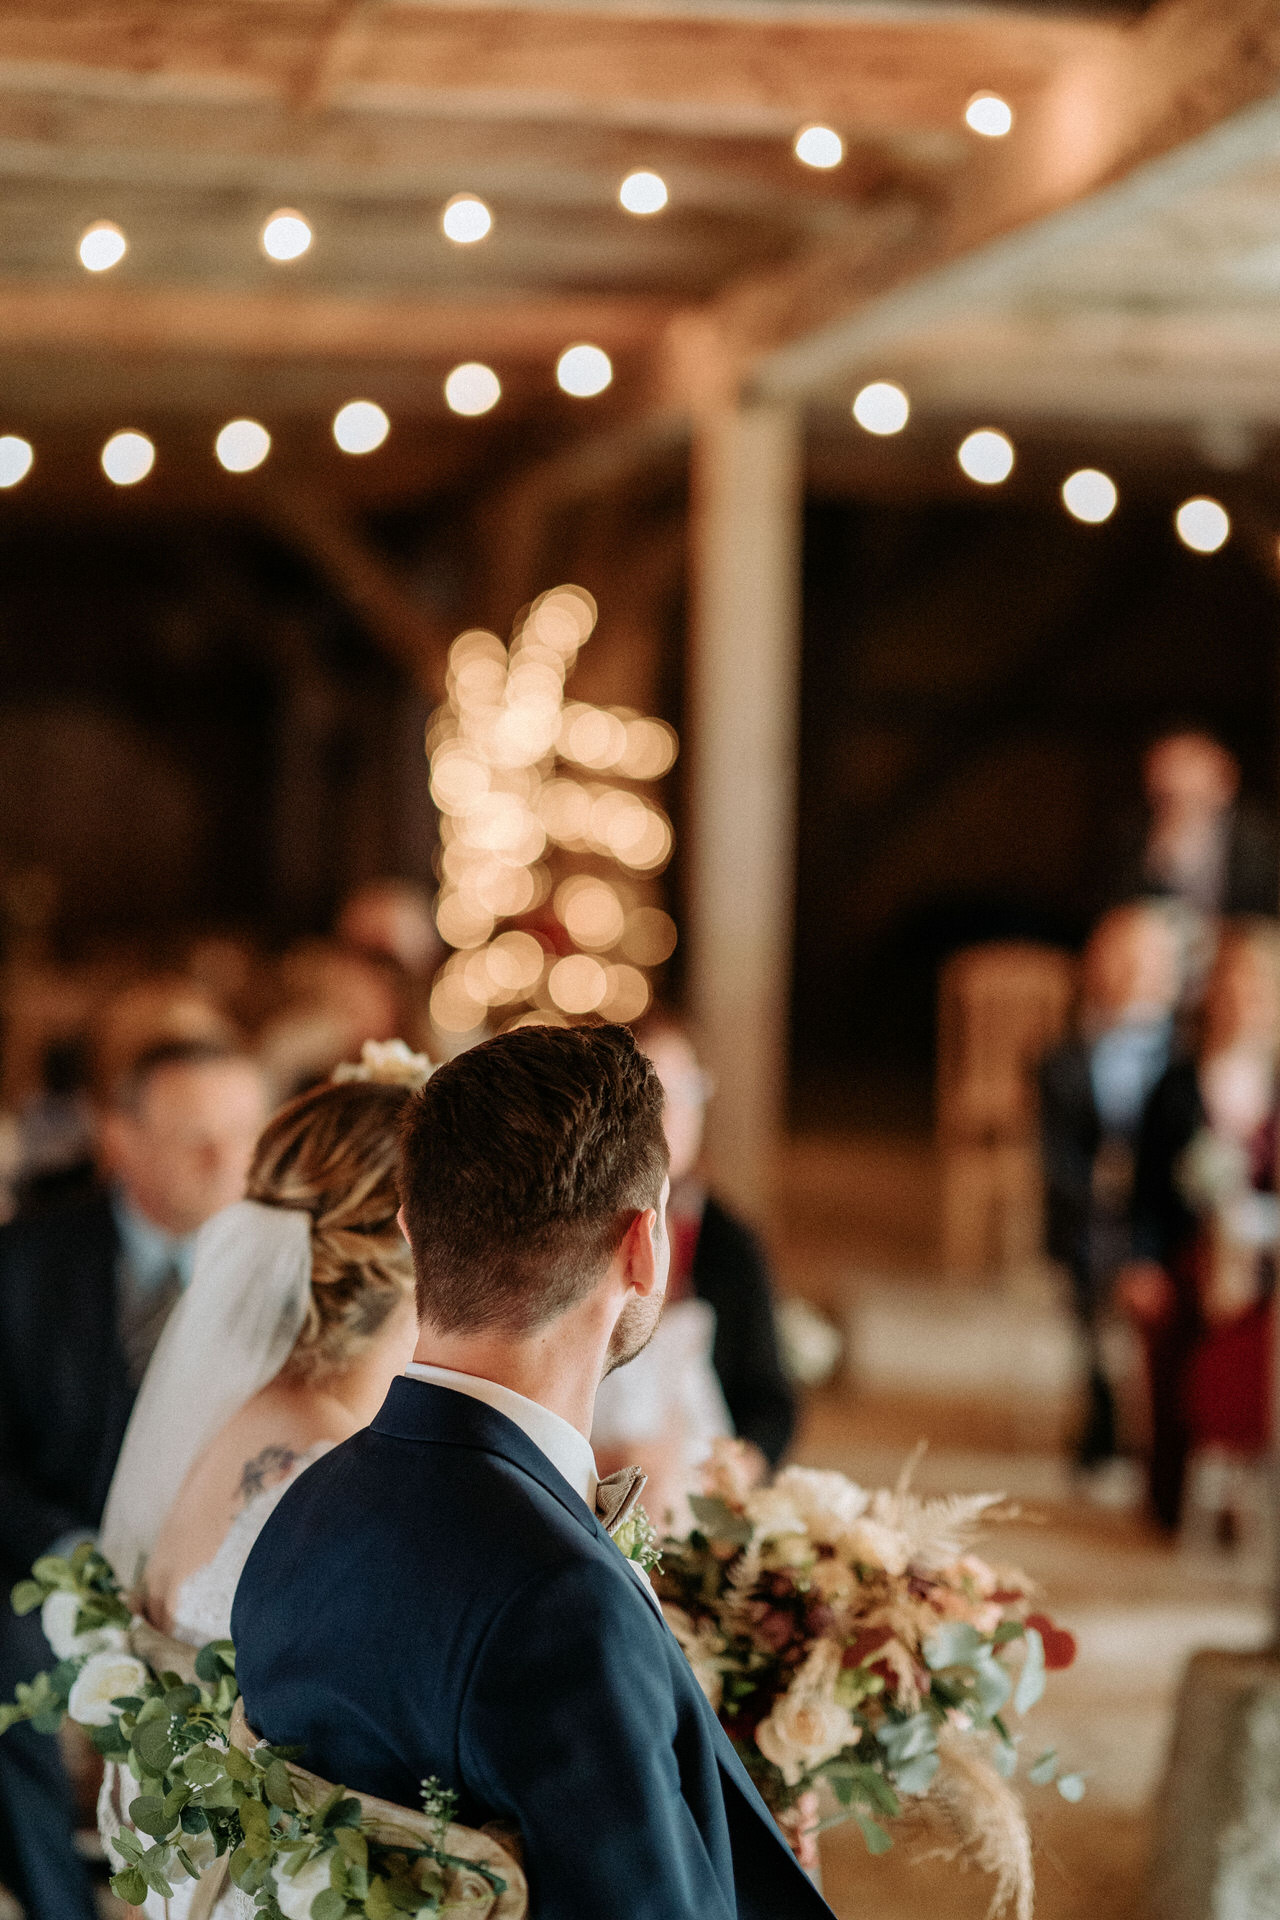
- Each wedding officially starts with the wedding ceremony. It doesn’t matter if it is a free, church or civil wedding ceremony. Here bride and groom say yes to each other. Highlights are the moving in, putting on rings, the first kiss and the moving out. Often friends and relatives line up outside the door and welcome the couple afterwards.
- This is followed by the congratulations of the guests. Here you have a chance to take a nice picture directly from every guest, friend, mother and other relatives. After the congratulations often a group photo directly follows. Ask the couple, if every guest has already arrived.
- After that the the champagne reception follows (sometimes congratulations directly lead there anyway). Whether directly at the wedding ceremony or at the celebration location. Here the bride and groom are toasting with the guests and have a good time.
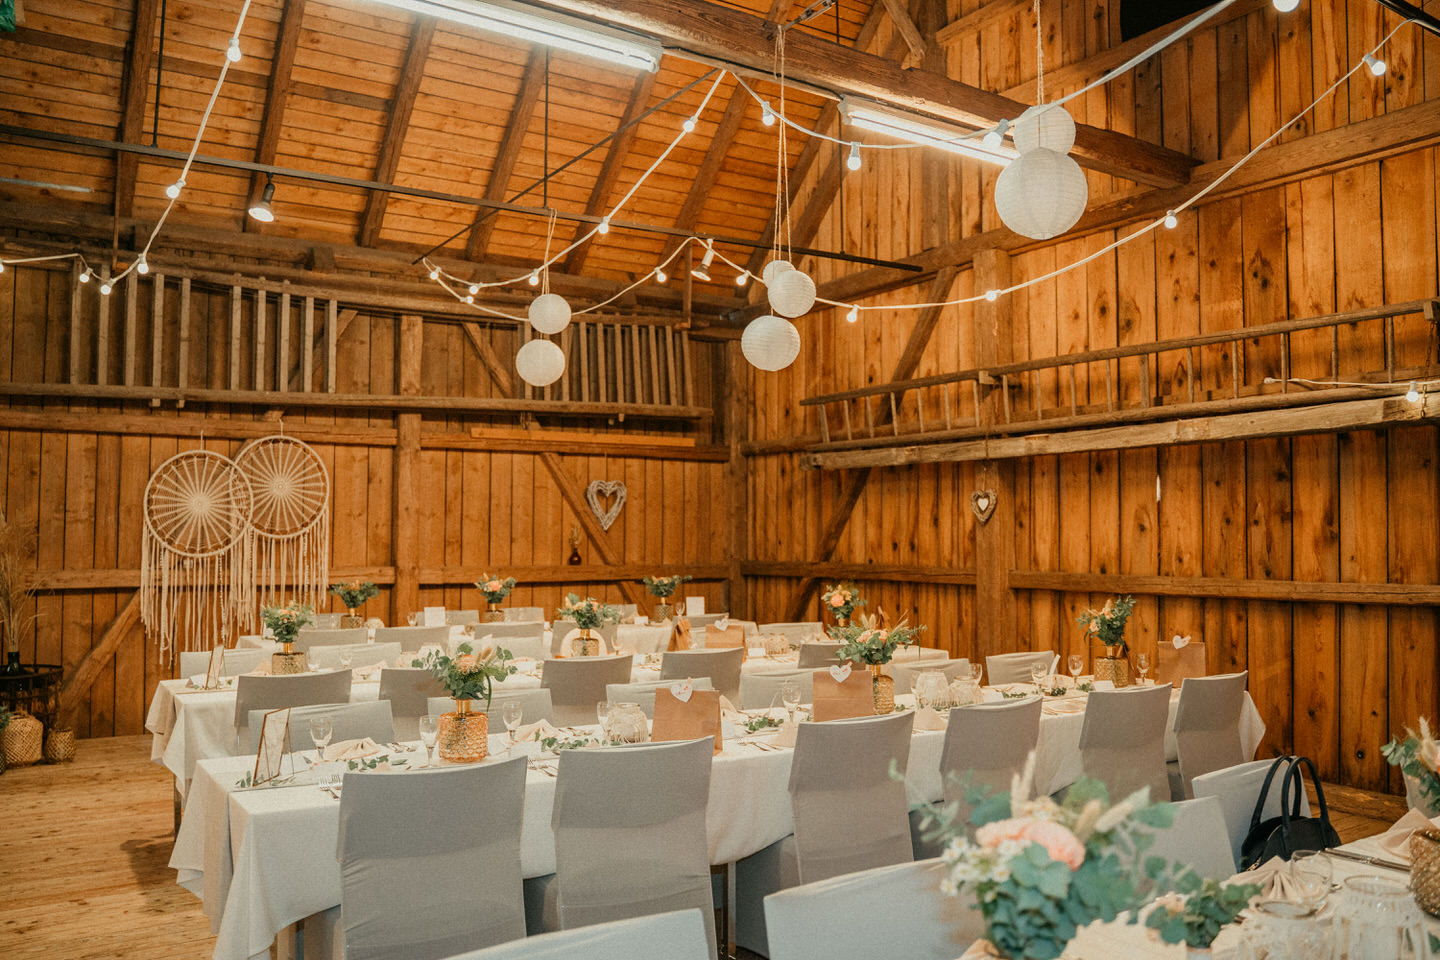
- Then the celebration begins. There you should take detailed photos of the decoration and location before the guests arrive. Then you mingle with the guests and wait for good moments.
- Usually the cake is then cut and coffee & cake rung in. Accompany the bride and groom at the cake cutting ceremony. Afterwards, however, people should be left alone while eating. The mood then becomes more settled and relaxed after eating the cake. You can also use this time for a big group photo and family shots (if not already done).
- If the bride and groom portrait photo shoot was not already done before, the hour before dinner is also a good time slot for it. The guests are having a good time own their own during this time and will hardly miss the bride and groom (sounds mean, but is true).
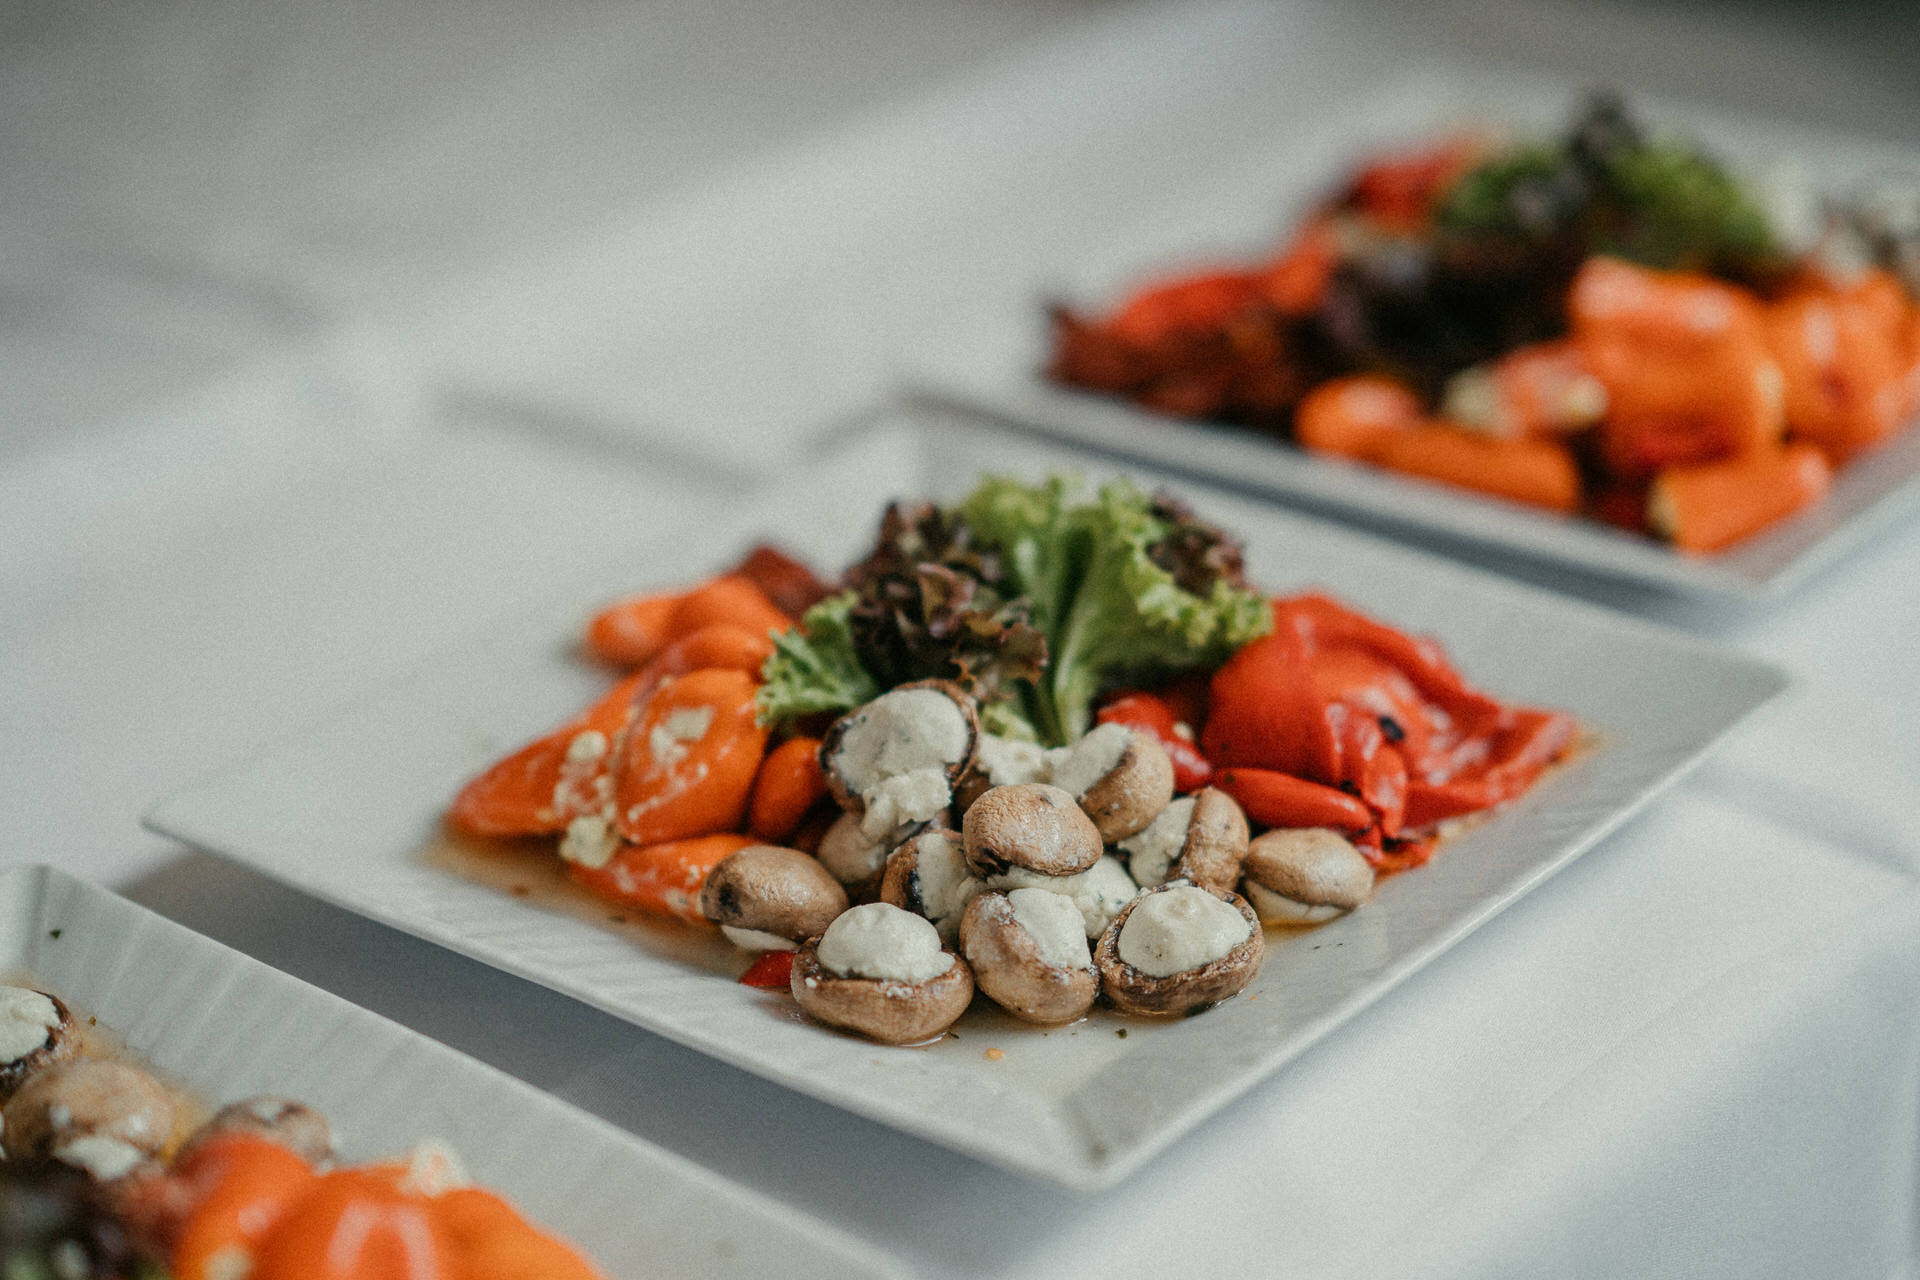
- This is followed by dinner. Here you can take some food photos of the great buffet. But let people eat peacefully afterwards. Often between the courses also some speeches and performances of the guests will take place. Therefore, you should still have the camera ready at your table.
- After the courses follows the first dance of the bride and groom. They will open up the dancefloor. The intimate moments of the first dance are very valuable in this regard. Afterwards you mingle with the people at the wedding party. Don’t hesitate to photograph some funny moments.
Your task is to capture the day’s agenda from getting ready to dinner:

Equipment checklist
What equipment should you actually bring to photograph a wedding? In contrast to a casual photo afternoon, things tend to get a bit more complicated here. Since you often shoot over 12 hours, the light also changes. Not only by the sun, but also by the different rooms and program points. In addition, of course, by the premises and their size.
You need equipment for a wedding that covers all room sizes and lighting conditions in the best way possible.
Of course, it is also worthwhile here in the preliminary discussion to ask exactly about the location. Or better yet, to visit it yourself beforehand: How big is the room? What kind of light is there? After that, you can then pack your camera backpack better.
Generally, you should bring these things with you:
- 1-2 camera bodies* (preferably full-frame for more low-light capacity)
- Single strap* or double strap*
- 1x wide angle focal length: 24mm lens* or 35mm lens*
- 1x standard: 50mm lens* or 85mm lens*
- min. 4x 64GB memory card* (for safety always write in dual card slot on two cards each)
- min. 3x camera battery*
- Battery charger (if you unexpectedly reach the last battery, you can recharge it in the location)
- 5-in-1 foldable reflector*
- Flash incl. diffuser*
The problem is generally that there are often very dark places throughout the day. Therefore, I shoot with two cameras – each with a fixed focal length. For small places you can use a 24mm and 50mm on your cameras. For more spacious places a 35mm and 85mm lens. This eliminates the need for time-consuming lens changes.
If you use only one camera, you can also use a F2.8 zoom lens (e.g. 24-70mm). But then you might have to deal with higher ISO noise. Unless the entire wedding takes place in very bright locations or you are only booked while daylight. It is therefore impossible to create a fixed list of equipment.
Save the book now!
If only one camera is available and you are photographing in dark locations, a 35mm 1.4 lens is often a very universal focal length as well.
It is best to mentally divide the wedding into small chapters (as shown in my agenda). Depending on the location in the schedule, mentally set which lens you will use next and whether you need a flash (this is usually the case indoors).
In any case, make sure that the batteries are charged and the memory cards are emptied. For this purpose, the camera’s sensor should be cleaned regularly to avoid sensor stains.
Also think about the sounds your camera makes. To avoid disturbing noise, you should disable any beep sounds from your camera. For the wedding ceremony, you can even consider using a silent or silent shutter mode.
Checklist for yourself
Weddings, as I said, often take between 8 and 16 hours. That’s a hell of a long time and you see the other guests eating all the time too. So it will also be necessary for you to take a few precautions to get through the day.
Note that you do not always have time to eat something while the guests are doing it. The time you can be absent to eat or go to the bathroom is also very limited. You remember – every moment is unique. Therefore, you should also always be present in good condition:
- Eat something before you arrive so that you don’t get hungry again at the first opportunity.
- Pack small snacks that you can also eat quickly while going from one place to the next. Muesli and other bars are recommended here. This way you don’t have to be the first to rush to the buffet for all the appetizers. This is not always well received (I have already tested that).
- Avoid eating things the day before that are difficult to digest or whose tolerance you have not yet tested.
- Plan on getting enough sleep the night before – the wedding day is expected to be long and tiring. You must be in top shape for this.
- Plan your bathroom trips smartly so you don’t miss out on the really important moments.
- Pack enough water and drink enough. Weddings usually take place on the hottest Saturdays of the year and the job is more stressful than you often think. Drinking enough is important!
- Check the weather in advance in various apps.
- Take enough clothes with you. In 16 hours the weather can change spontaneously – both due to temperature changes and rain. Therefore I always have 1-2 jackets extra with me. Note that you may also need a change of clothes in case a rain shower catches you by surprise or you accidentally drop food and beverages on your shirt.
- Consider your shoe choice – you’ll be walking a lot, but at the same time you want to look chic and not make too loud trampling noises.
- Pack any medications you might need. With my horse allergy, the allergy tablets have already saved my day once, when the celebration location turned out to be right next to a stable. To do this, you should pack everything as you would when traveling. Also consider tablets for nausea or diarrhea.
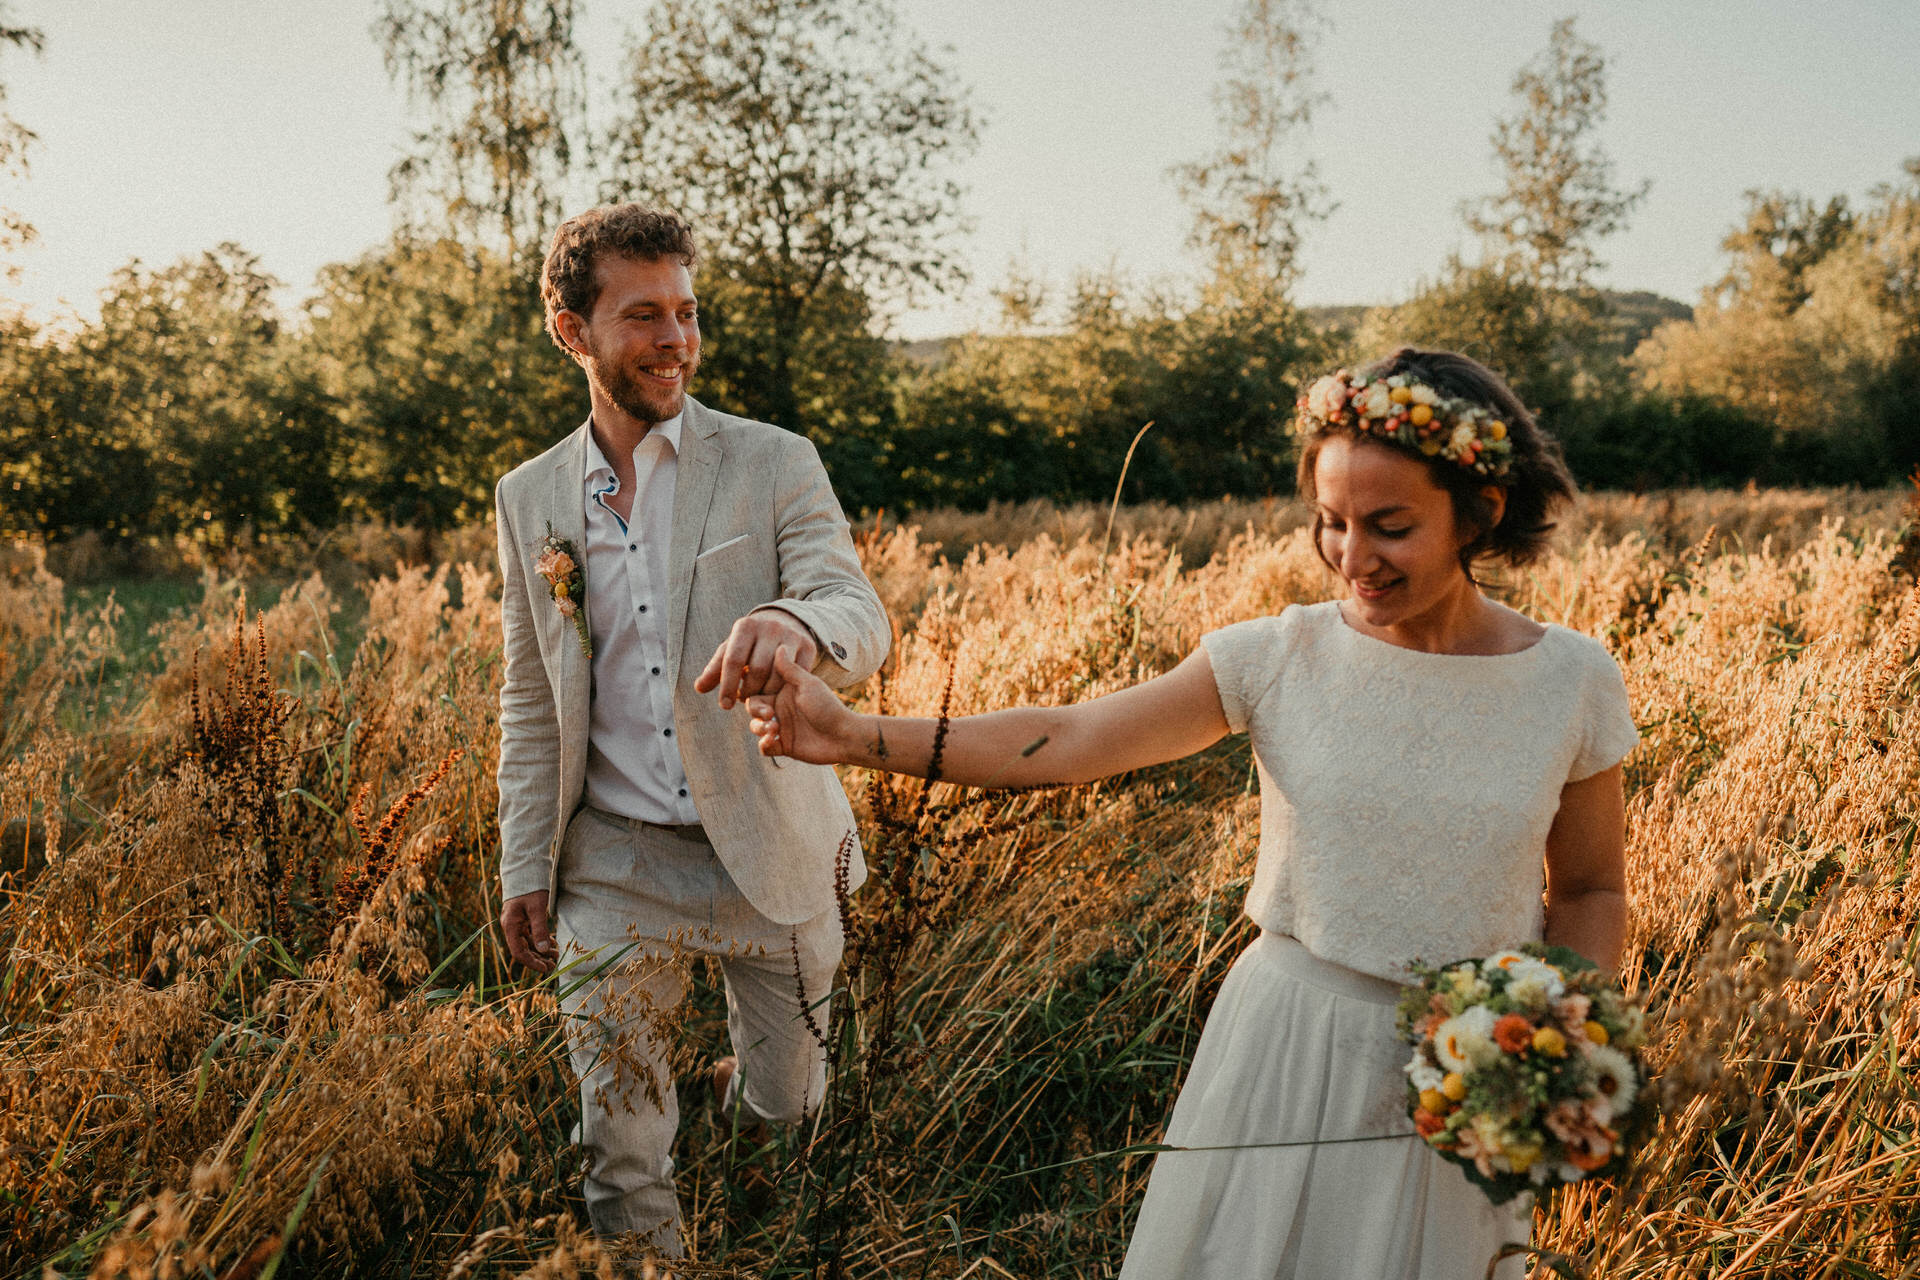
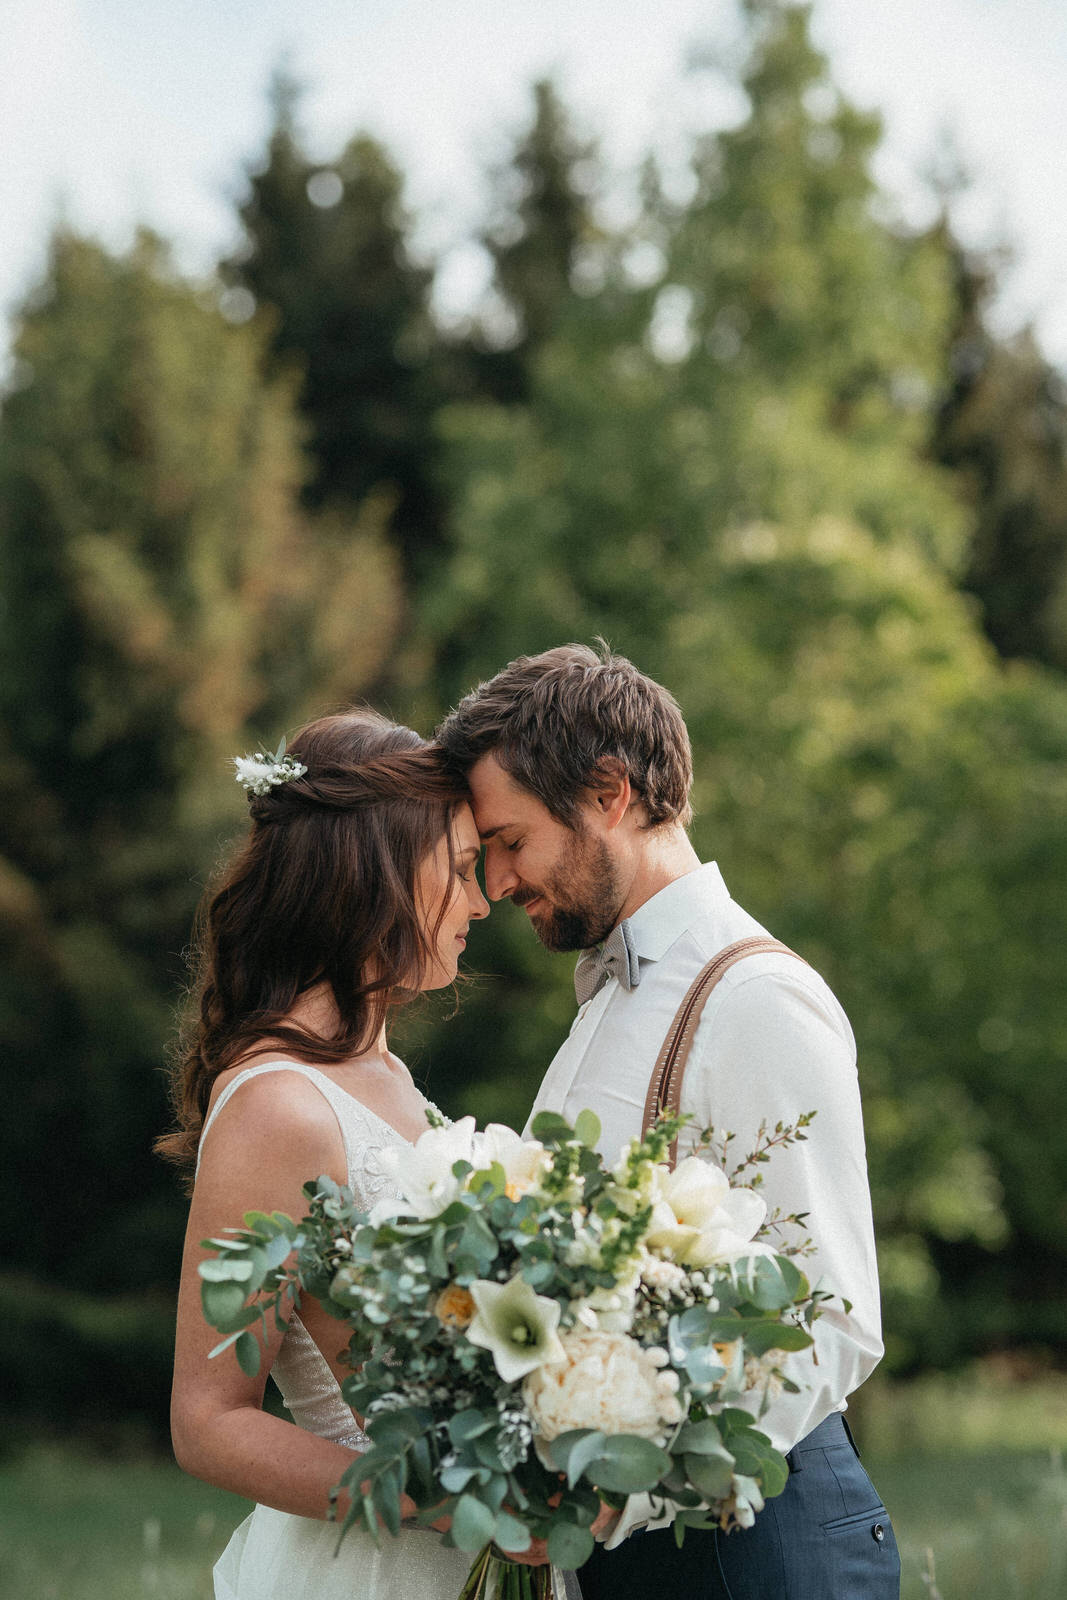
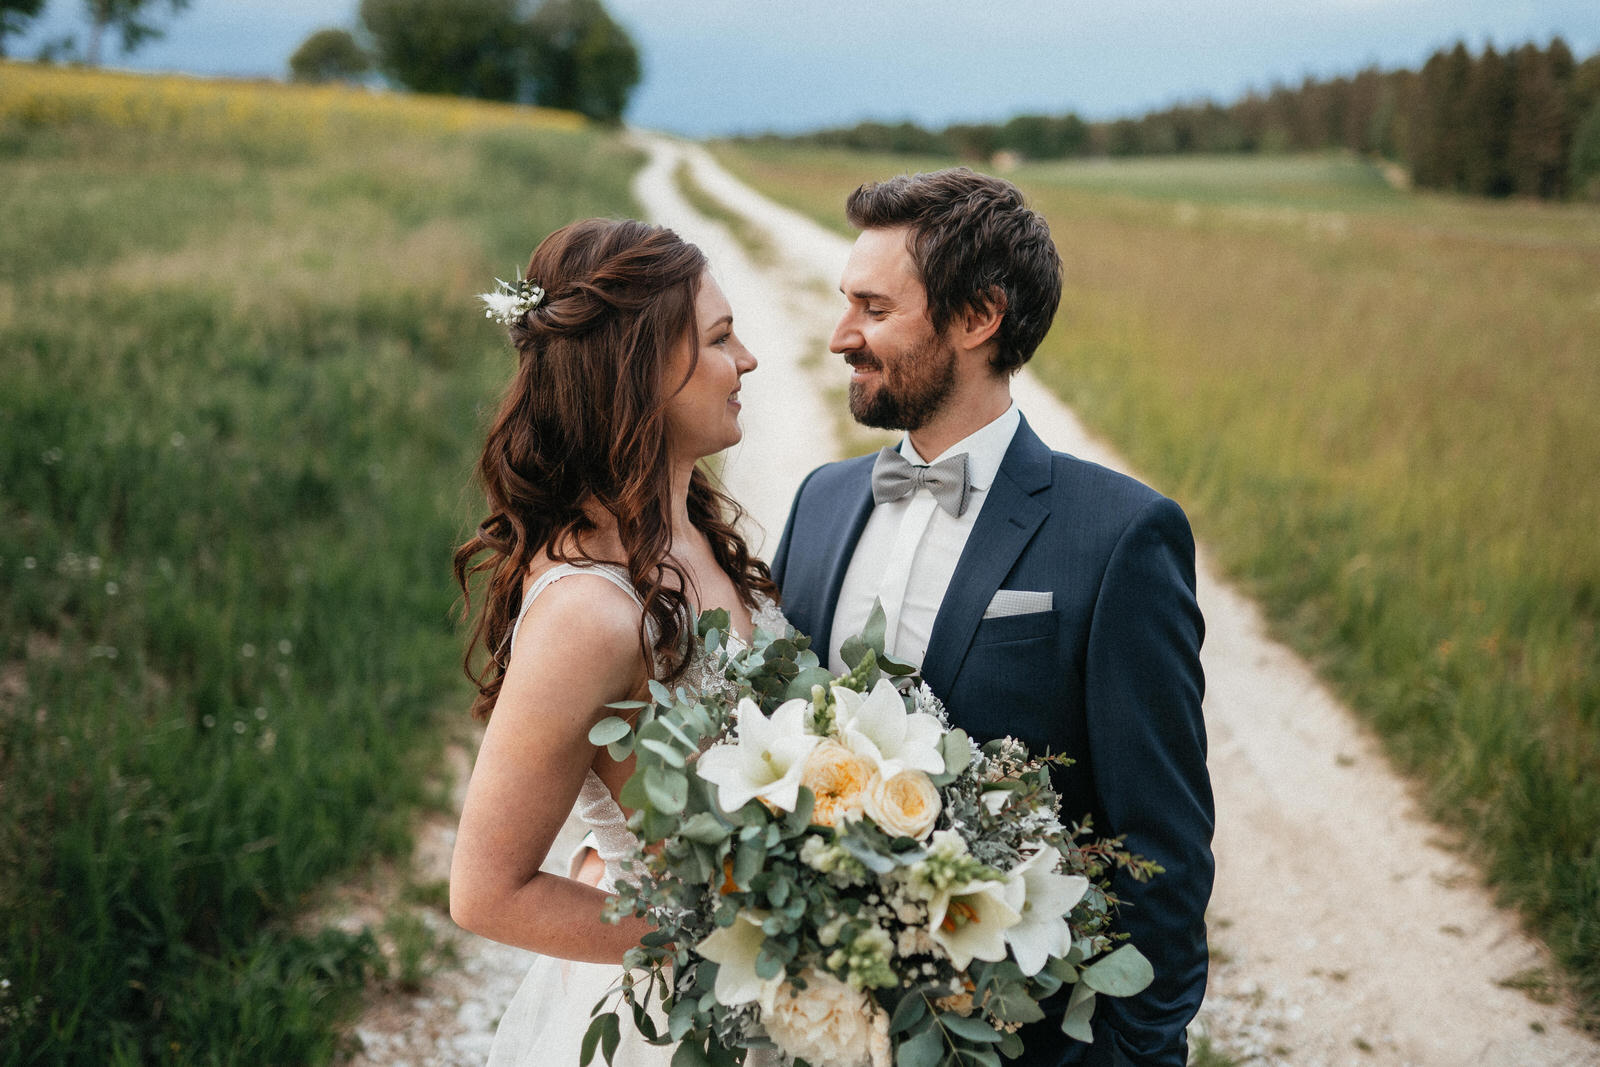
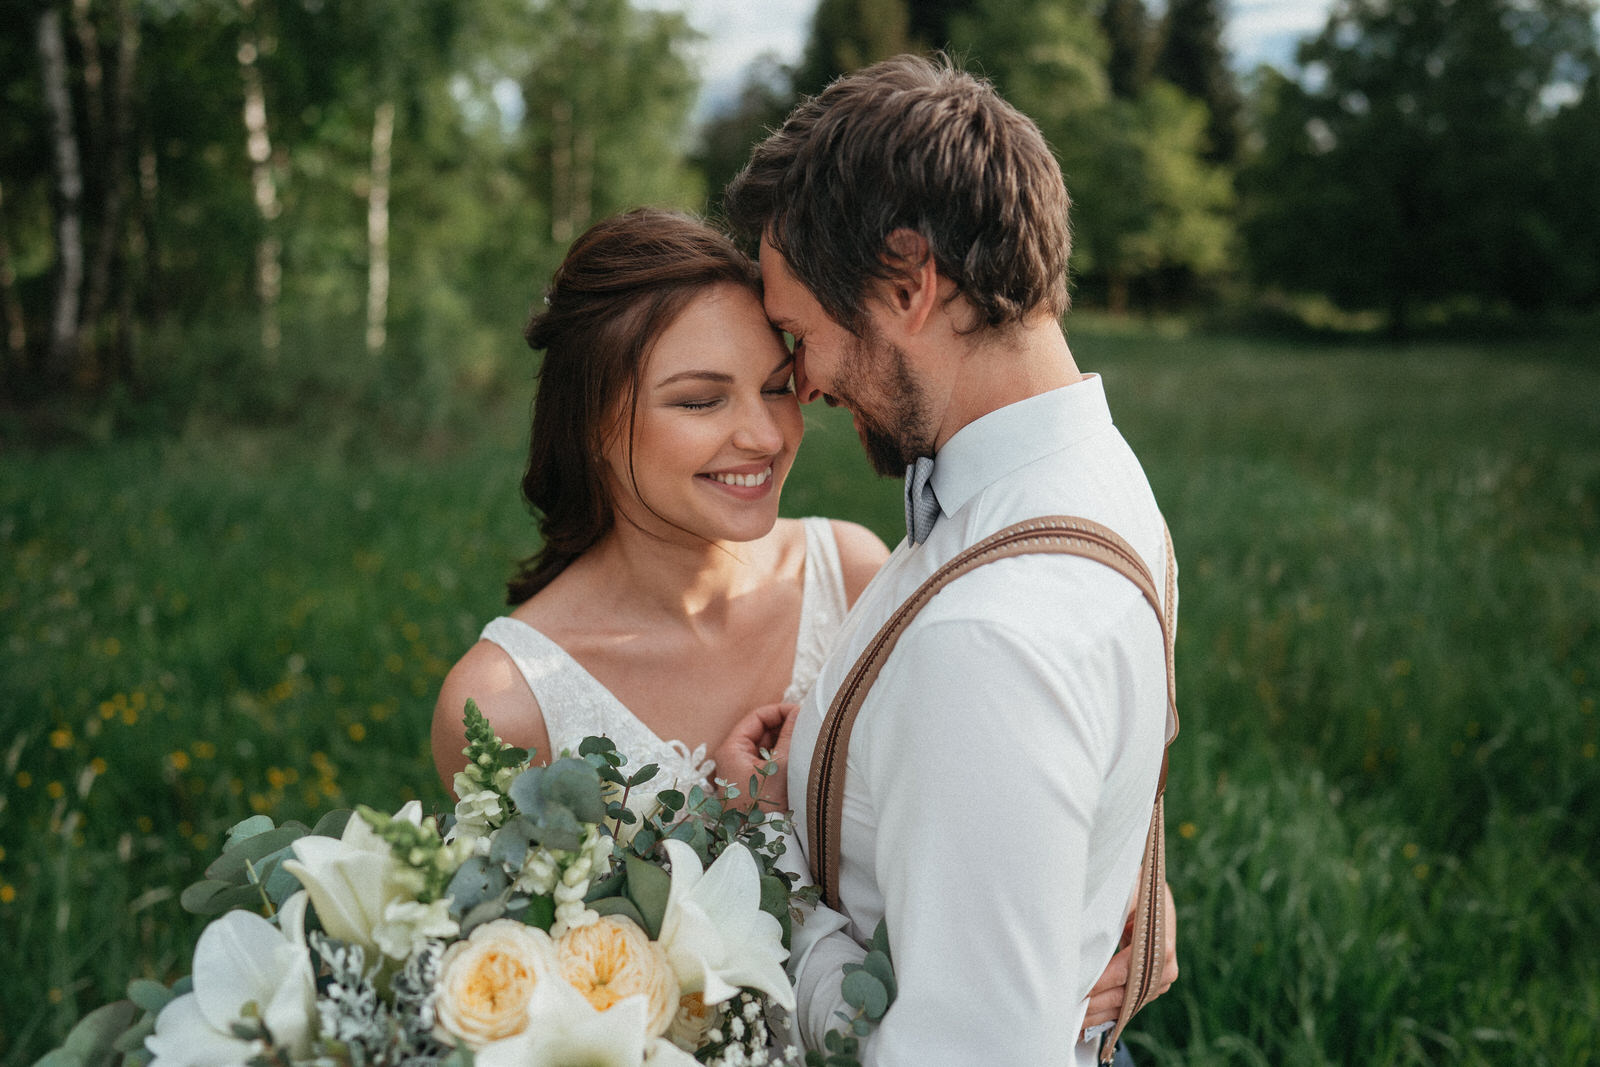
5 tips and tricks for bridal couple portraits
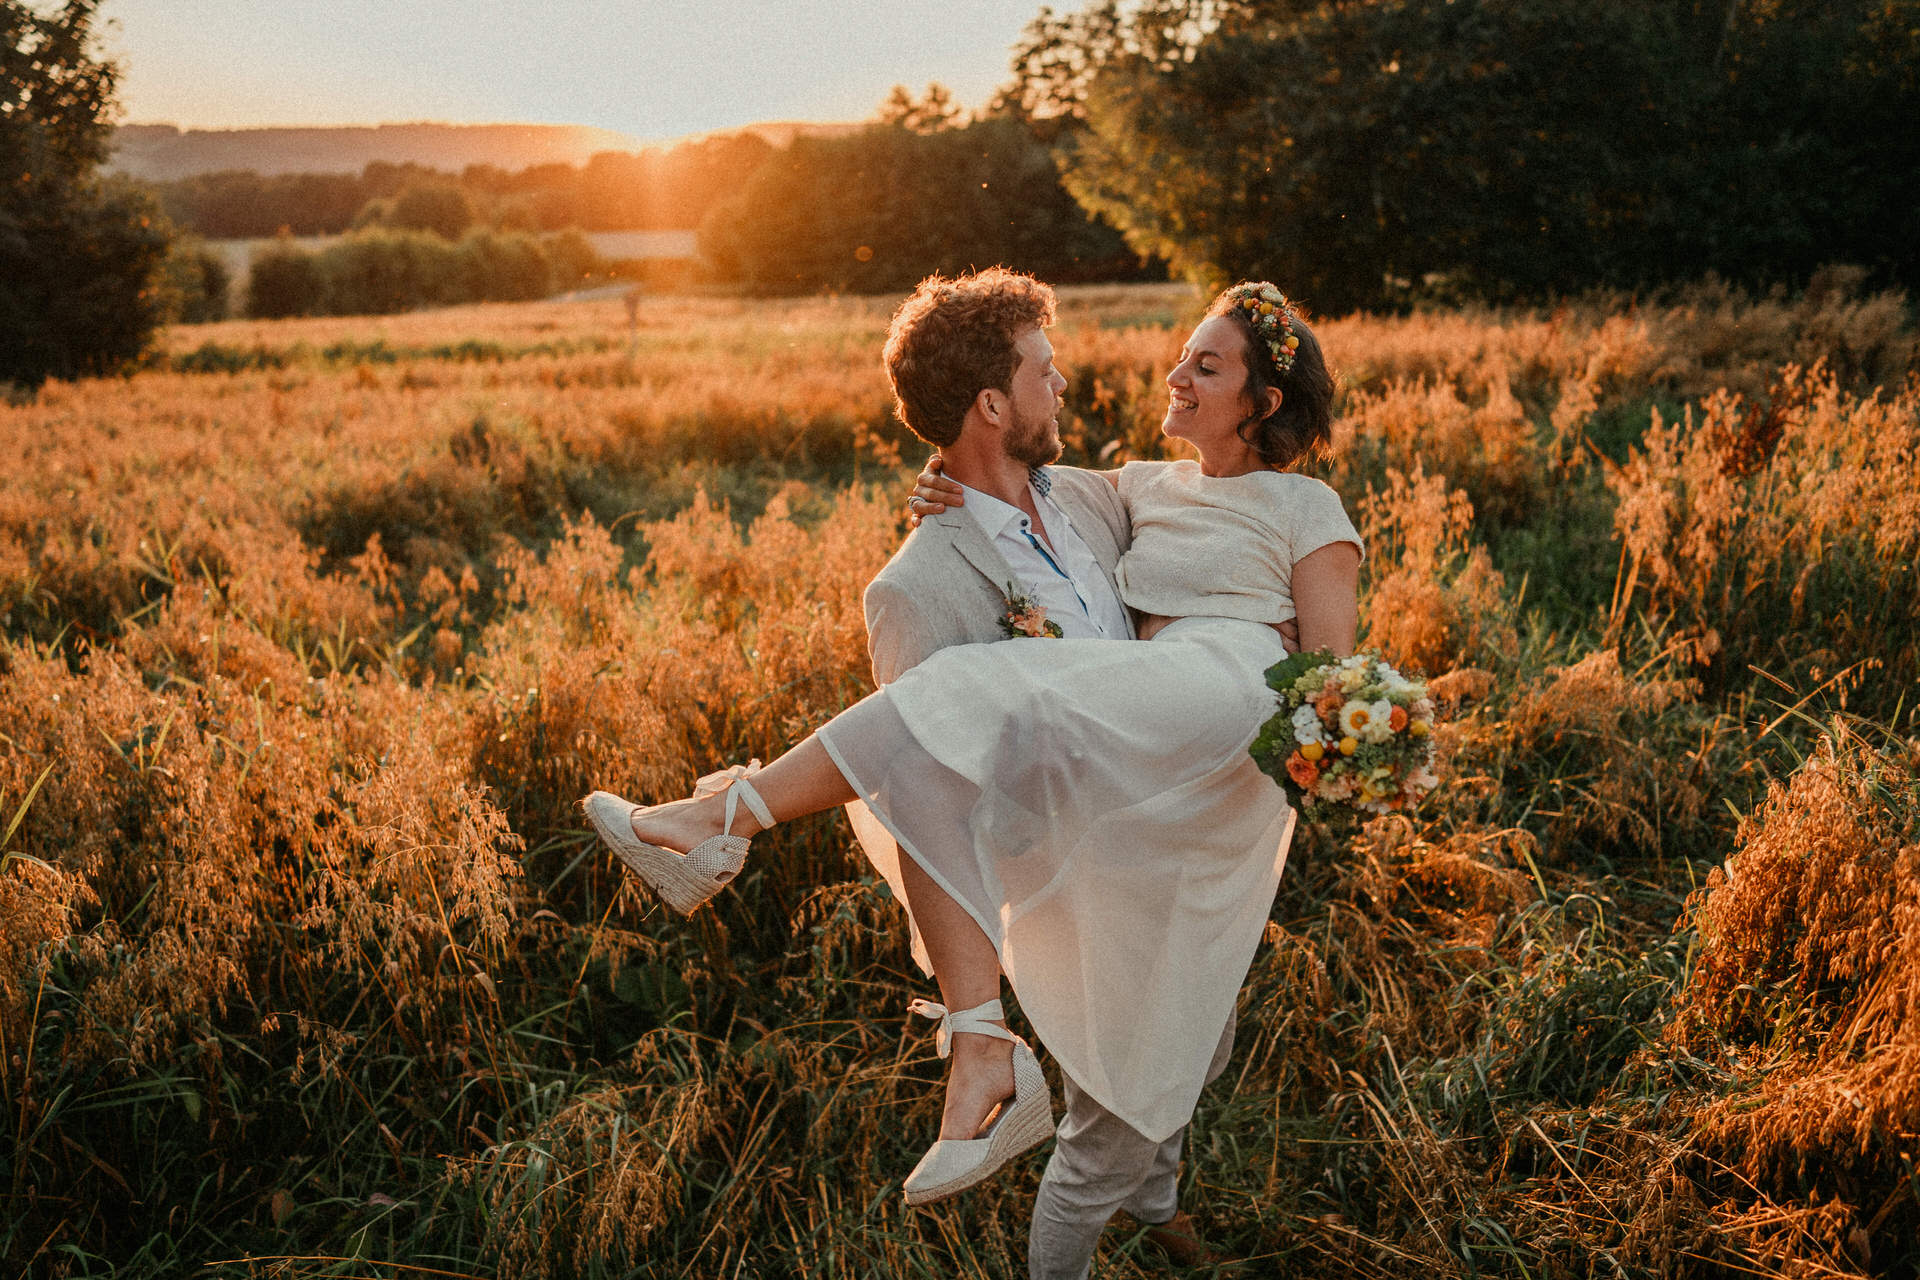
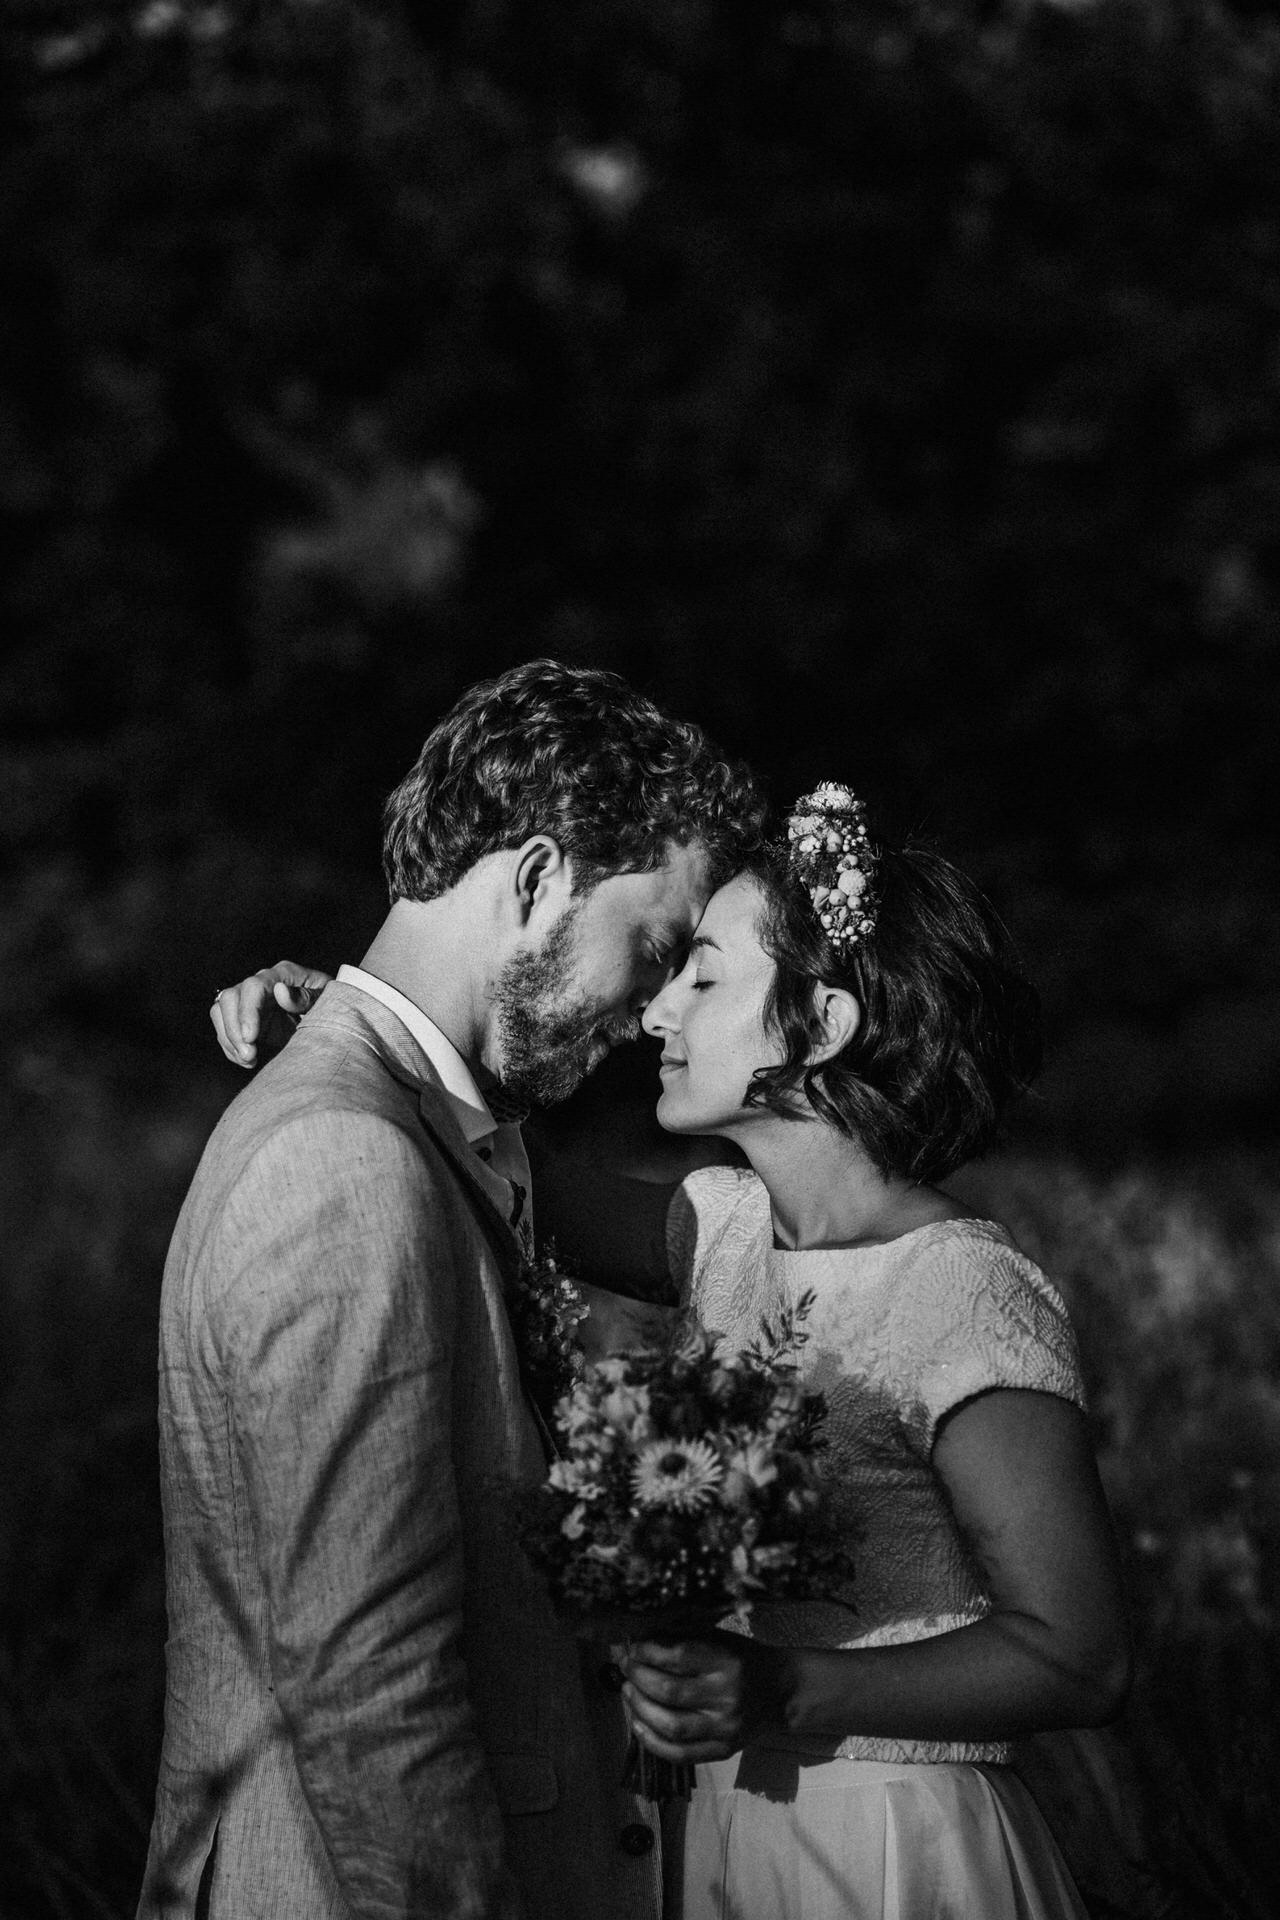
A highlight of any wedding are the bride and groom portraits. Here you move away from the wedding party together with the bride and groom. You will need one hour alone with them to photograph romantic portraits of the two.
Together with the group shots, these images are among those that you can actively shape. While you have to stick to the schedule during the reportage and cannot intervene, the bride and groom are fully waiting for your instructions here. This makes the bride and groom photo shoot extremely different from the rest of the photos.
1. Plan the right time
Some brides and grooms want their photo shoot right at the beginning of the day “to get through it quickly”. This is usually at midday when light appears really harsh and not flattering at all. You should inform the bride and groom about that. You should try to plan the photo shoot afterwards. In best case it should take place towards evening with more relaxed and atmospheric sun.
Once one of my bridal couples wanted to be photographed even directly to the sunset, which was between the menu courses at dinner. But this doesn’t happen often, as sunset and dinner are usually at the same time. Most people want to enjoy their well deserved dinner.
If the photo shoot still takes place before the wedding ceremony, you often don’t know the couple well yet. Then you should plan 30 minutes more time for the photo shoot. So you can get to know each other a bit better before starting the photo shoot. If the photo shoot takes place during the wedding day, you already know each other better. If you have been out with the bride and groom for half the day, then 30-60 minutes is usually enough.
2. Take the right people with you
The purpose of the bride and groom shoot is to create a romantic and intimate mood. A group of drunken wedding guests perfectly prevents this romance from happening. Therefore, the photo shoot should not take place even near the other guests. Should a group or individuals get the idea “to accompany the photo shoot”, consistently reject this.
There is only one exception here – and that is the two groomsmen. These are usually the closest friends of the bride and groom. Nothing will go wrong here. These two people can even give you a hand here and there. It is often the case that the maid of honor helps to organize and drape the bride’s dress for the photo, fix the hairstyle and other things. The best man, on the other hand, can hold the reflector now and then.
So keep a large group of people out of your photo shoot, but 1-2 familiar people can even help you (they will be very happy to do so).
3. Less is more: the best place for bride and groom portraits
Most of the time bride and groom portrait backdrops look more elaborate than they are. You should keep it simple. Most of the dynamics will not come from the location, but from your bride and groom themselves. And that works best, if you are on your own and have some room for experimenting.
Pick a quiet and inconspicuous place in nature, rather than a spectacular one, but where a lot of people are.
Save now incl. free THO07 preset!
Places like a forest, city park, pond, clearing and other idyllic place go along well for this purpose. I’ll show you more places in my post about finding photography locations incl. 25 instant ideas.
Also you should make sure that the place offers enough shade when the sun is shining strongly. By moving into the shadow the light will appear more pleasant on the people than in direct sunlight.
4. Photograph unstaged portraits
It would go beyond the scope of this article if I were to list all aspects of portraits again. So I recommend to check out my other comprehensive guides for portrait photography.

As already mentioned your bride and groom are the actual content of your image. On the pictures should be a certain sensuality, romance, good humor and also some wit. What you should avoid are posed images. Therefore, the following tips:
- Do not think of the photo shoot as such. But rather as a walk of the bride and groom. You step into the background and observe.
- Create a setting where the bride and groom can move around freely
- Invite them to laugh, dance or tell jokes together
- Get some posing inspiration on Pinterest and create a mood board
This type of photography should be your main goal. Apart from that, there is still room to stage a few classic portraits. For this you can follow the well-known rules for successful photo shoot posing.
5. Keep your portrait checklist in mind
By removing the two main characters away from their wedding party, you should make sure that you won’t forget something to take pictures of. It would disrupt the flow if you later realized you missed individual scenes and asked to be removed from the wedding location again.

Capture the following things:
- Photos together while standing
- Photos together while running
- Full body shots
- Upper body shots
- Head shots
- Different expressions (e.g. serious, relaxed, happy, smiling)
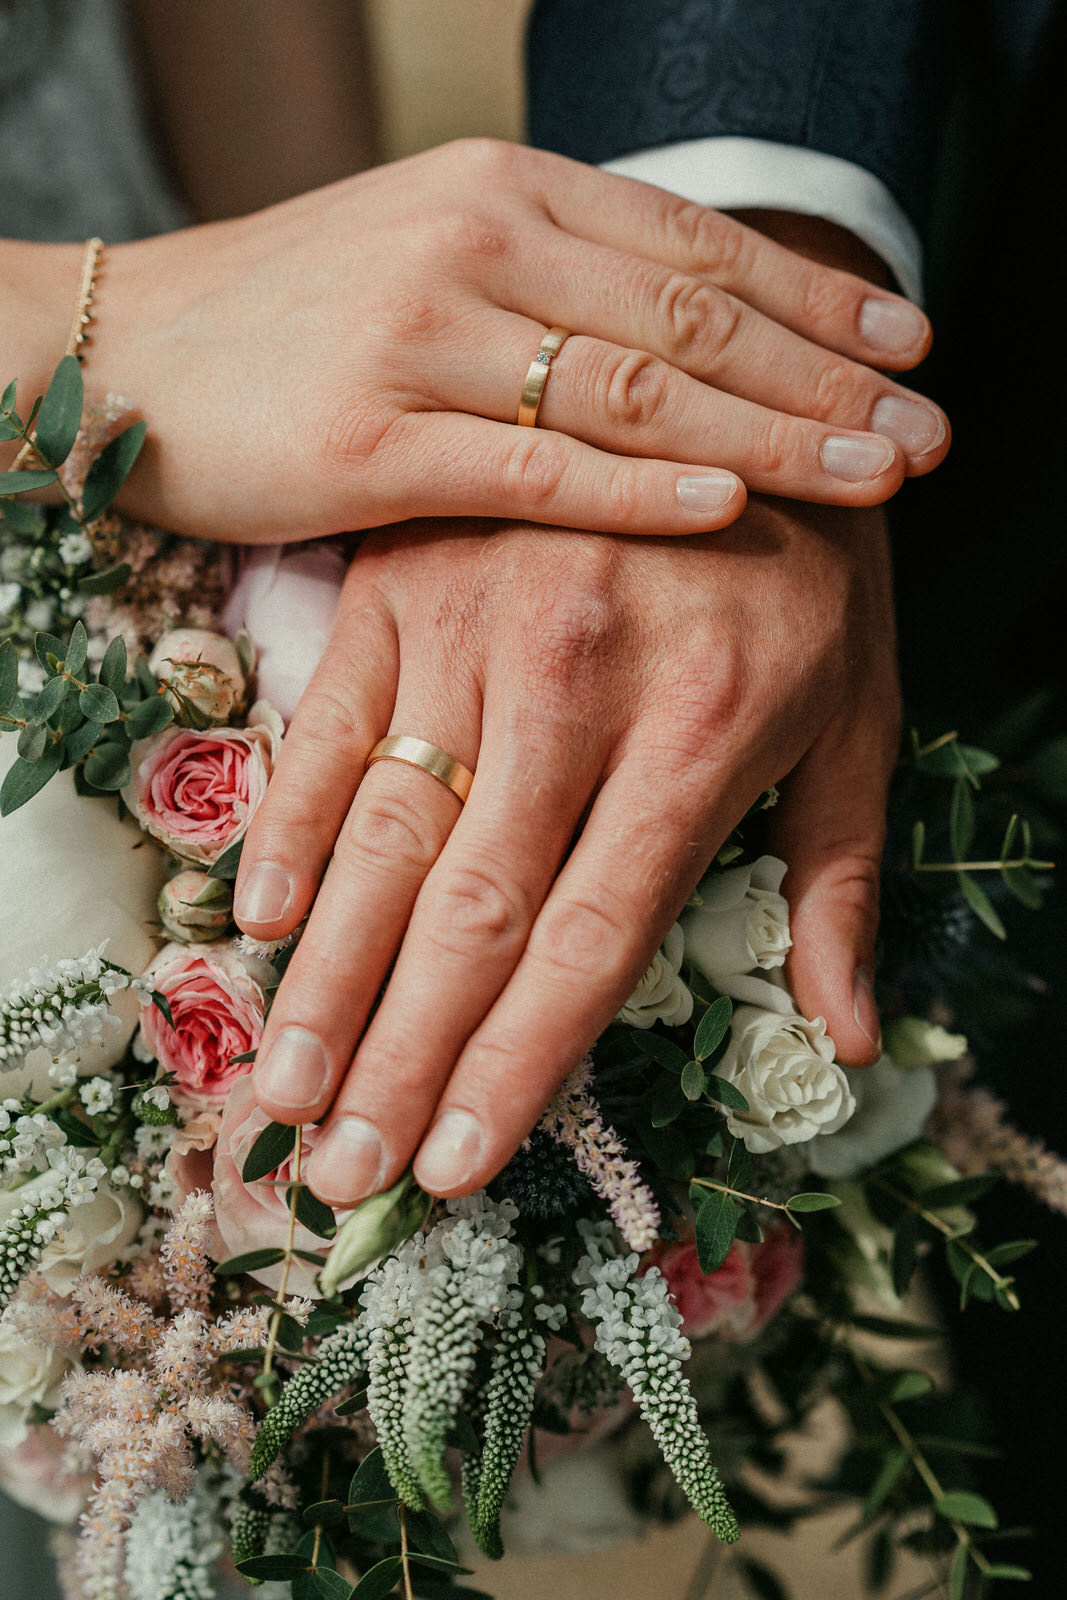
- Details or close-ups of wedding dress / suit / outfit
- Close-up of hands with rings
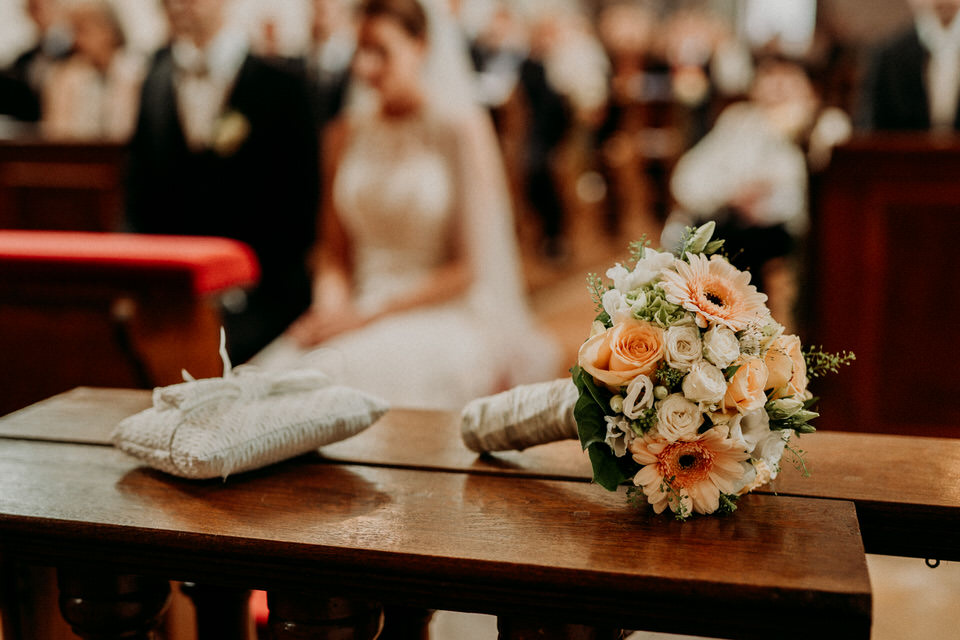
- Detail shot of the bridal bouquet
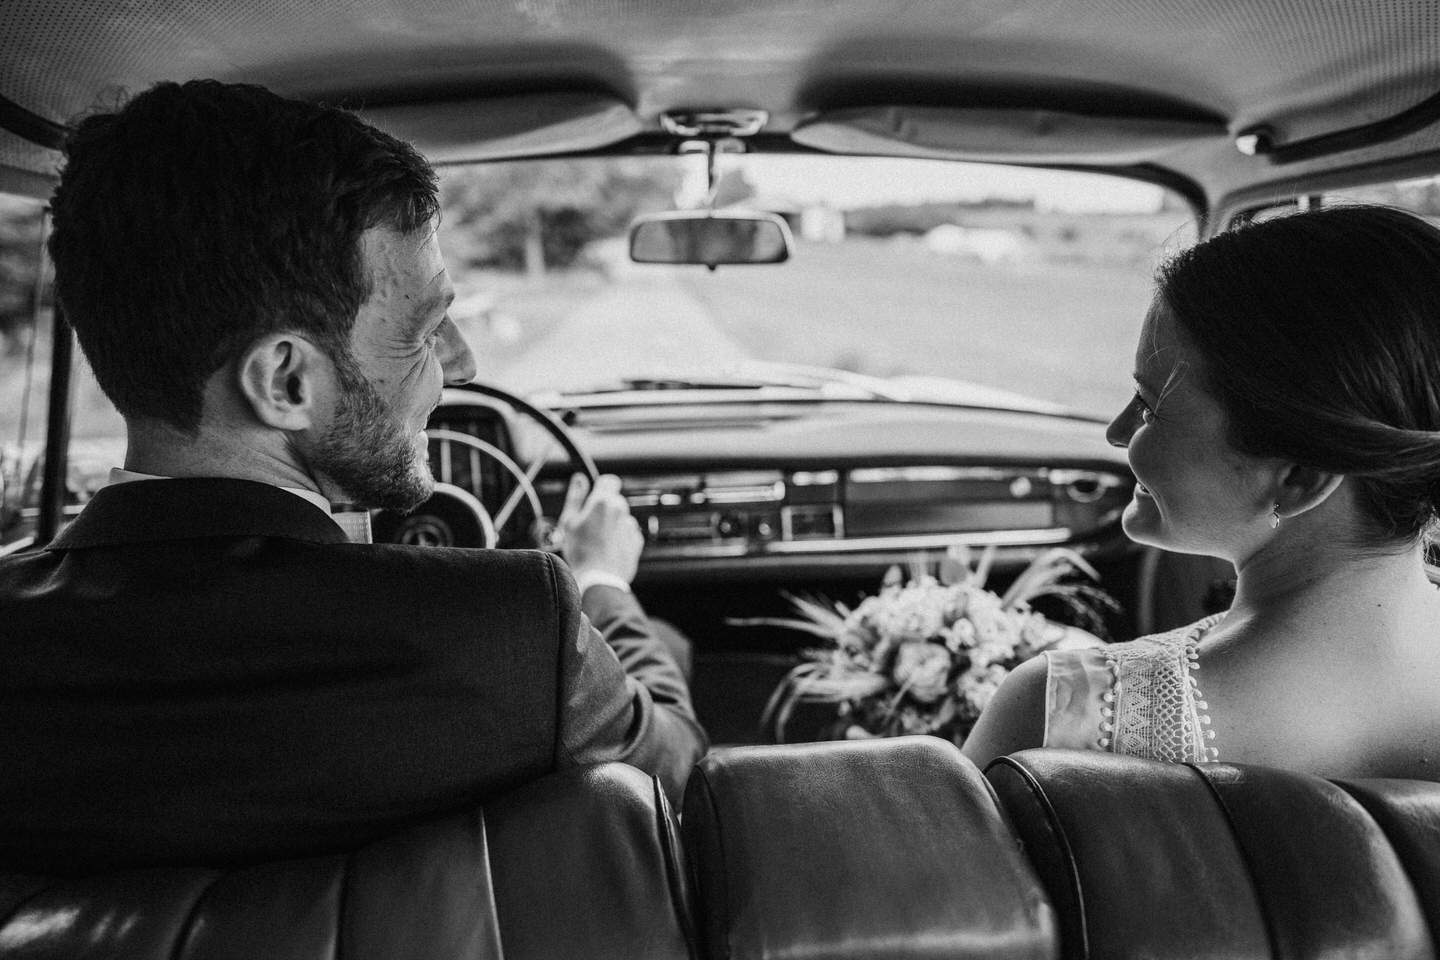
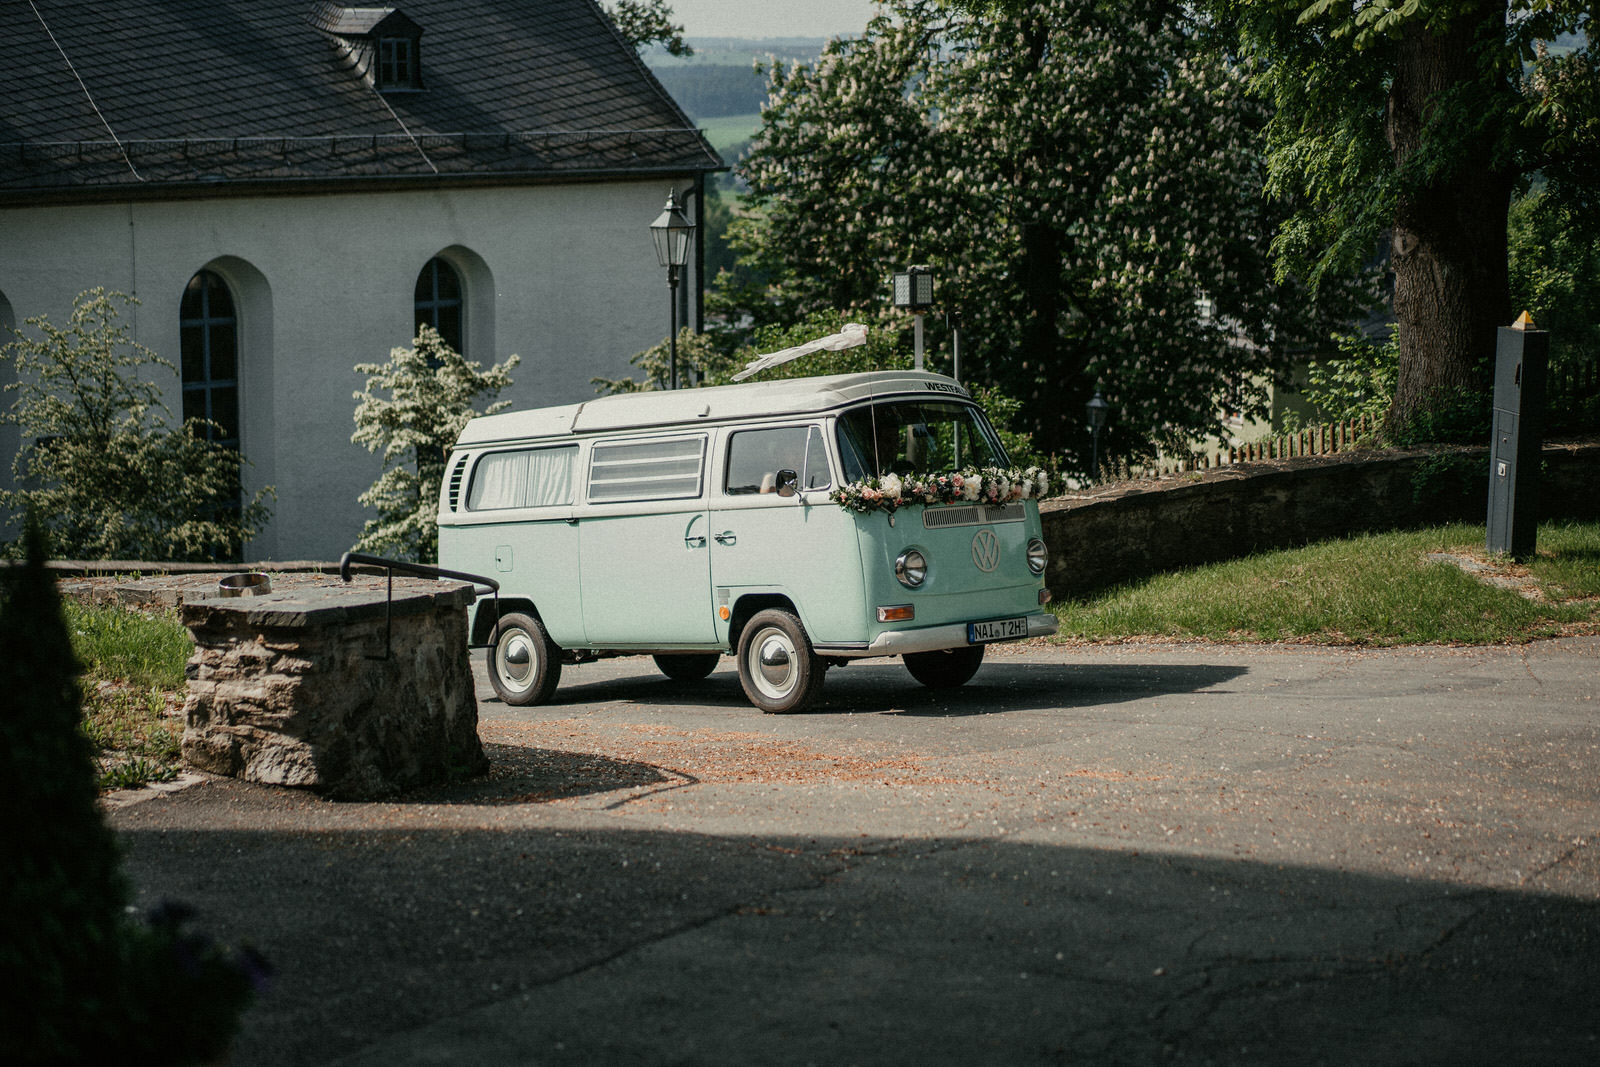
- Pictures together with the wedding car
10 tips and tricks for wedding photography reportages
The largest part of the wedding photos will be the reportage. Minus the bridal couple portraits, that’s often about 8-11 hours.
Save the book now!
In this report-situation you cannot give any instructions. While you can give some instructions or ask to repeat a movement during the getting-ready or first-look, you cannot disrupt the wedding ceremony and the rest oft the day.
So overall, you need to be ready and adapt to all situations as best you can. Moments you miss are over. Gone forever. Therefore, try to keep a clear head and anticipate what is happening next. Try to think from a bird’s eye view. Knowing the schedule and keeping it in mind will help the most.
1. Be in the right place at the right time with the right equipment
You should try to always be in the right place at the right time. This is how to safely capture all the key moments.
Try to see emotionally important moments before they actually happen. Be prepared.
If you are in the right place at the right time, the next step is to imagine (or know) what might happen in a moment. Prepare yourself mentally, look through the viewfinder and compose your picture. Then you standby and wait for the moment to occur and take the picture in the viewfinder as you have just imagined it.
The more weddings you will photograph, the easier it will become for you to skillfully anticipate the moments. Due to the fact that most weddings (and z.B. churches) are very similar, you will be able to transfer many good locations, angles and motifs almost 1:1. After some time you will know how to capture the important moments with confidence. In this way it is possible to train creativity and the photographic eye.
2. The right settings: Keep your camera ready to shoot
I always preach to set up and expose your camera manually. To completely adjust the camera by yourself for maximum creative control. However, the circumstances are often a little more uncontrollable in wedding photography. While you can use the M-mode of your camera as usual for a bridal couple portrait photo shoot, the lighting conditions can change quickly for reportages.
Strong sunlight, shade, cloudy or low incandescent light indoor: all these can follow each other rapidly. I once had a free wedding ceremony this year where clouds pushed in front of the sun every minute. Then disappeared. So it was constantly light and then dark again.
With a manual exposure, you are more turning the wheels instead of concentrating on the motif. That’s why you should choose an automatic for the wedding reportage.
For heaven’s sake – of course you don’t use the full automatic mode! Instead, you provide a good compromise between creative control and speed via program automatic. If you’ve only ever shot in manual mode, be sure to check out my guide to the camera’s automatic and light metering features.
The trick is to set the important parameters yourself and let the camera do the rest. Most of the time you will want to set the aperture to a certain value (z.B. F2.0) and have a shutter speed fast enough to shoot handheld (min. 1/250s). The rest is done by the camera.
The best way is to use the AV mode with automatic ISO.
To be on the safe side, you should definitely shoot in RAW format. This not only makes sense for correcting slight incorrect exposures. But also to adjust the white balance of the numerous locations later still precisely.
In addition to the exposure, the autofocus must also be lightning fast and accurate. I’ll give you a few tricks in my big autofocus guide as well.
3. Have a plan: Your reportage checklist
Image that you forget to take an important photo on the wedding day. When you (or the bride and groom) notice that at home, it’s too late. This photo is missing forever. There is no way it could be recreated. So to make sure you won’t miss anything: Create a checklist. Either on paper or in your mind. No matter how – the most important thing is that you do not forget anything.

Of course, the checklist also includes all the scheduled points listed above. Between these moments you will be busy capturing all the details. But do not forget yourself in it and always have an overview of the basic agenda. Details can usually still be photographed later.
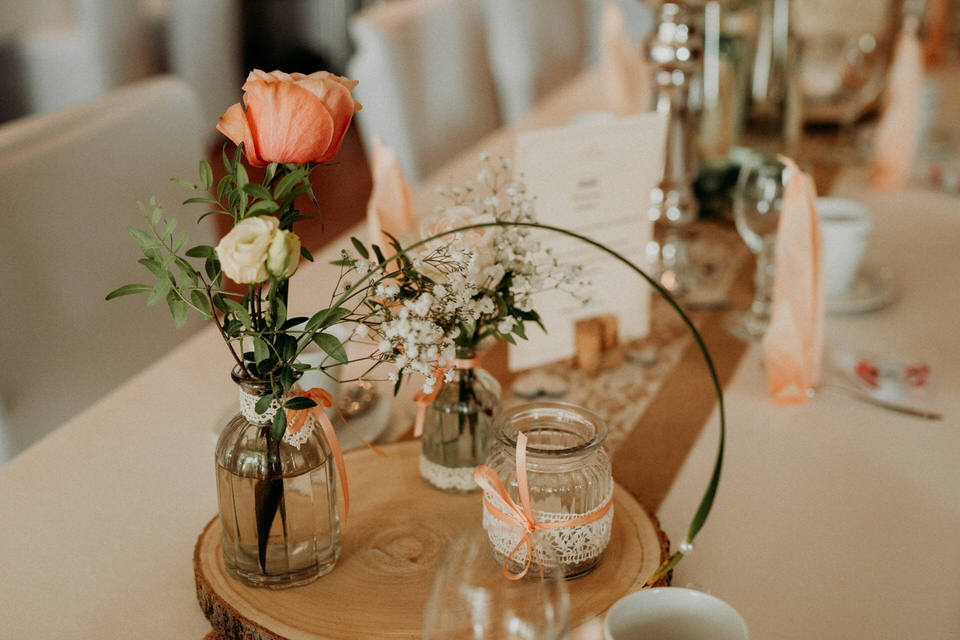
These subjects should be on your reportage checklist:
- Group photo
- Group shots with groomsmen and family
- All persons in nature (e.g. at the champagne reception or congratulations)
- Shots of the wedding rings (before the Wedding ceremony on the cushion / box)
- Shots of the bridal bouquet
- Shots of the location and decoration
- Shots of the wedding car
This list may vary from time to time. If necessary you can expand it. Again, it is important to contact the bride and groom to clarify this individually beforehand. Often it is also worth contacting the groomsmen, as they often plan special events such as fireworks or letting balloon fly.
4. Church and registry office photography tip: Don’t be too pushy at wedding ceremonies
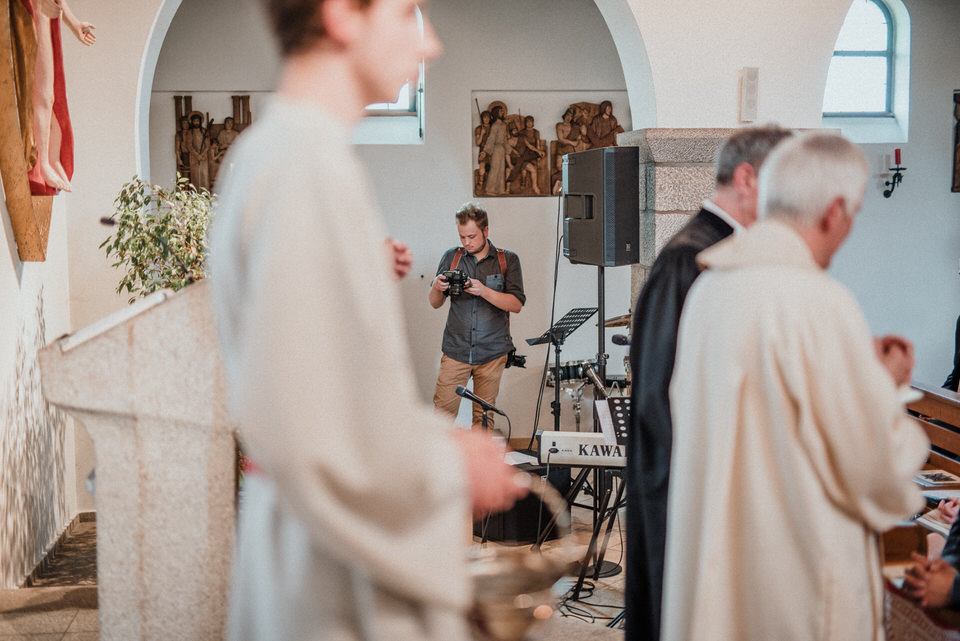
Please do not forget that you are just the wedding photographer. And not Rambo shooting his way through the jungle. Especially at the wedding ceremony everyone sees you anyway – so try your best not to draw the attention of the guests completely to you.
It’s best to find a standing place near the bride and groom, from which you cannot be seen in your “Standby-Mode” by everyone. But from this position you can see everything and take photos immediately when needed. This can be, for example, a pillar or a wall projection behind which you can stand.

Try to find a spot to stand before the ceremony starts. So you can pick the right lens and focal length. With a further focal length in the telephoto range you can still follow everything from a distance. If you only have a wide-angle lens with you, you have to constantly get close and right in the middle of the action. So it will be easier to have a focal length of 85mm or more. At least on one of your cameras.
Noises also attract unnecessary glances at you. I have heard complaints from people in wedding parties about two other photographers that were very distracting: Because of constant DSLR clicking of two cameras from two people at the same time, no one could concentrate on the wedding ceremony anymore. So do not overdo it!
Also your clothing style can distract by making noises: consider your choice of shoes and materials of your clothes. Avoid loud stepping noises or crackling materials.
Shooting silently and quickly is very important. Otherwise this will cause a skeptical look as soon as they notice you. To capture real and pure emotions, you need to release the shutter before anyone notices you and your camera.
5. Don’t be boring but socialize
Oh – so much to consider but I have to keep smiling? Apart from the fact that you should enjoy photography anyway, you don’t want to be most boring “guest” on such a day. Of course, many situations are stressful and you often sink into thoughts e.g. if the camera settings will work for that situation.
Nevertheless, the people gathered here to have a nice day. As a photographer you are part of their happiness and you should not destroy this mood. Even if you are in a hurry or have to concentrate: always be friendly, smile and be in a good mood.
This is part of your appearance as a professional. Do anything but don’t just silently, grimly, quietly and secretly take your photos. Show your face and character instead. At the latest by taking the big group photo everyone will see you anyway.
So present yourself the way you want to be remembered.
In addition, you need to animate people to look happy as well. While taking the group photo you can put a natural smile on everone’s face by making some little jokes. The photos will get better.
You will see for yourself that even the people who seemed very serious at the beginning suddenly open up. After the group photo, many people will start conversations with you on their own.
To avoid suspicious looks from photographed people, you always have to become a part of the whole wedding community. A few short conversations with some guests usually open doors to natural looking photos.
6. Be on site earlier, get an overview
Be one of the first on site. That would be at least 30-45 minutes before Wedding ceremonies start. So you can get an overview, if you do not know the ceremony location yet. And even if you know the location: lighting conditions can change daily.
Find out before the wedding begins:
- How bright is the light?
- How much space does the location offer?
- Where can I stand unobtrusively during the wedding ceremony?
- Where can I park my car as close as possible?
The last point has nothing to do with laziness, but with your equipment and fast access to it. I don’t like to take the complete camera bag with me. The equipment is not only inconvenient in the church, but also presents a target for thieves.
Because of that you need to point out, what lens and equipment you will ned for the next hour in the church. Is the location quite small? Then take focal lengths of 24mm and 50mm with you. Do you have much space? Then take the 35mm and 85mm lens with you, so you don’t have to get completely close all the time. If the location is too dark you should use a flash or fast lenses. However, I generally do not recommend using flash in churches.
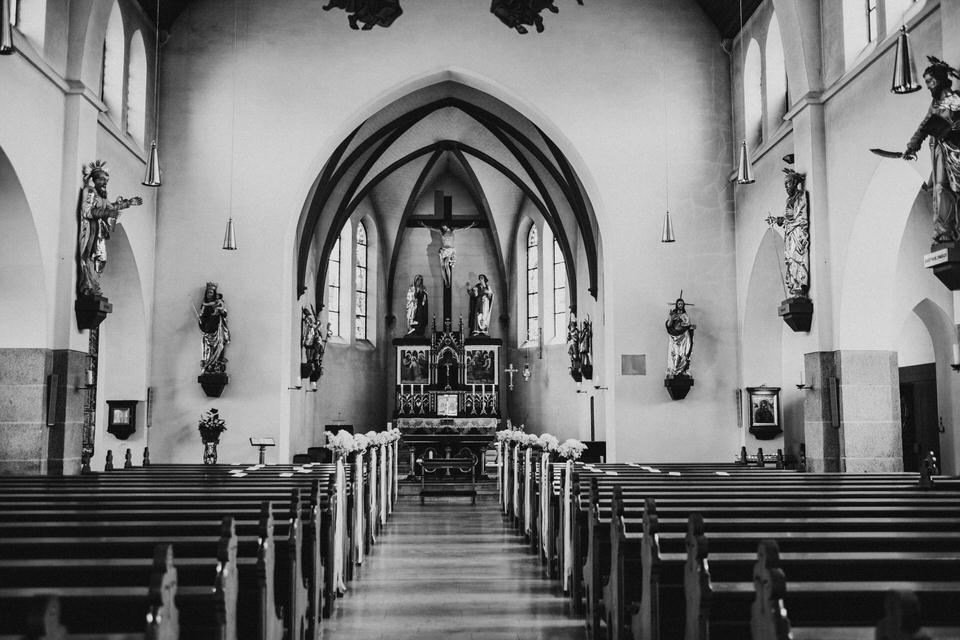
Tip: While you’re figuring all this out, you can also take a few photos of the empty location without people (view my example). This usually forms a nice contrast in the reportage later, as soon as the place is then filled with people and life.
7. This is why you should prefer fixed focal lengths
In the equipment checklist above I already mentioned the lenses. The first two reasons for fixed focal lengths are repetition:
- Brighter optics for dark locations
- Better image quality & character
- Fixed focal length for more exciting compositions
The third point is new, which is both an advantage and a disadvantage. Here’s an example:
I did my first wedding with the 24-105mm Canon F4.0 L lens. And then I stood rooted to my spot in the corner and just zoomed in and out. The pictures were okay – but nothing more. Then I started to use fixed focal lengths (primarily because of the light problem). But that showed me another big advantage.
With a fixed 50mm lens, I was now forced to get more into the action. And you could see that in the photos later: There was much more dynamic feeling in them. More liveliness. The pictures were great compared to just standing next to a wall and zooming in.

Now this may sound contradictory to the above point about being inconspicuous – but you shouldn’t be too shy either. You have to find a compromise between little disturbance and good photos. I simply ask myself beforehand: Will the couple be more thankful for the picture later than »angry« about the short disruption now? Decide if the photo will be worth it.
As you see fixed focal lengths are more suitable to achieve this liveliness and an exciting composition in the photos. Once you have learned how to photograph a good picture, then you can also go back to the “lazy” Zoom lens again. After my training with fixed focal lengths, I’ve found that I can use the zoom much better now than I could back then.
However, you also have to think more about what focal length you choose in a given situation. Quick changes are not possible, otherwise you will miss important moments. Or you could drop an expensive lens in the heat of the moment. A good alternative is to take two cameras with you. Then you can switch between two focal lengths easily.
8. Don’t make it boring – vary in angles
Later, a beautiful wedding picture story should be delivered, retelling the day of the bride and groom. The sequence of events can be thought of as a movie, but told in still images.
Still, the parallels to film are important for your series. The plot should always be exciting and tell the story from different perspectives and camera angles. Find a good balance between “loud” and “quiet” moments.
You should always try to vary your motifs as much as possible. Keep not only the big picture in mind, but also all the little details. Both the bride and groom, and the guests. For the bride and groom, there’s nothing better than seeing things afterwords they didn’t notice from all the excitement right at the wedding.
A good example to compare your story with is a professional live recording of a band’s concert. Due to fast cuts and many perspectives, the concert video often appears more impressive than if you had seen the concert live from the last row.
So always remember to switch between perspectives. Show people sometimes near and sometimes far. Show not only the couple’s reactions to the events, but also those of the guests. This way you can often heighten the emotions of the special moments.
Consider: Who is showing the strongest emotion in the room right now?
9. Give important people a leading role
The bride and groom would like to be able to relive the entire day in the pictures afterwards: relive the sequence of events, feel emotions, see the location and all the details.
Also, the wedding is an event where some of the couple’s friends and relatives will probably see each other for the only time in their entire lives. Also, it is uncertain who will be able to view the photos with the couple 30 years later. Therefore, you can increase the value of your pictures by having the relatives and all the guests on them. Without these people, the wedding would be a day like any other.
Besides the large group photo and individual smaller group photos, show all guests in many other situations. Furthermore you have to consider who is really important to the bridal couple. These people should appear much more often in the pictures. While the newly brought friend of the 14 year old niece may deserves to be on a few pictures, the closer relatives should be seen much more often.
Therefore, give parents, witnesses, children, grandparents and very close friends a starring role in the story you create for the bride and groom. At some weddings I even had the feeling that their dog plays an high emotionally role for the bride and groom. Try to estimate the personal connections correctly!
10. Do not hesitate to use the clip-on flash
I already have two cameras with fast lenses with me – do I need to carry an extra flash?
Yes – at least for indoor use. Because there the light is often unpredictable. And often quite dark and dreary. With a clip-on flash you can regain control over the (lighting) situation.
Whether a small registry office, dark church, lightshow on the dance floor or rebuilt cowshed (yes, I’ve been everywhere) – it tends to be not only dark here. Also different light temperatures tend to cause headache. It’s always difficult when daylight, artificial light and the lightshow of the DJ meet each other.
So it is important to always put a flash on your camera before uncertain program points, you never know. When you use it you should flash only indirectly and bounce it against a ceiling.
Bonus: Gadgets for wedding photographers
In addition to the equipment mentioned at the beginning, I would like to list a few more things that you might not think of at first moment.
Bad weather equipment for emergency
The sun does not always shine. So take a fashionable matching umbrella with you for your couple. Even though most cameras are weatherproof – in extreme cases a rain cover can never hurt and will protect your camera.
Accessories
- Powerful TTL flash from Yongnuo for Canon* and Nikon* – Quite powerful and yet inexpensive
- Strong TTL flash from Neewer for Sony*
- Inexpensive Delamax reflector*
- Hama bellows*, microfiber cloth* and sensor cleaning kit* – There is nothing worse than noticing that the sensor was dirty after 8 hours of shooting photos
Conclusion: Wedding photography made easy
As you can see, there are a lot of things you have to pay attention to. This is what I have learned over the years as a wedding photographer. Even if mean people claim that the photographer only has to come by, press the shutter three times and help himself at the buffet after that. It is (unfortunately) not that easy.
However, these things quickly become a routine. Try to find a happy medium: Don’t be too pushy and annoying. But still intrusive enough to capture a memory card full of great photos. Liveness is often only created by being part of the action. By being active in the middle of the wedding party you will capture the money shot.
In addition, there is of course much more to wedding photography than I can address here. But with my recommendations you will soon develop experience on how to deal with all these things. After some time you will develop self-confidence and your photos will get better.
If you follow the above rules, it will come by itself. Be in the right place, anticipate situations and make compositions that can tell the moment as a story. This is the way to good wedding photos.